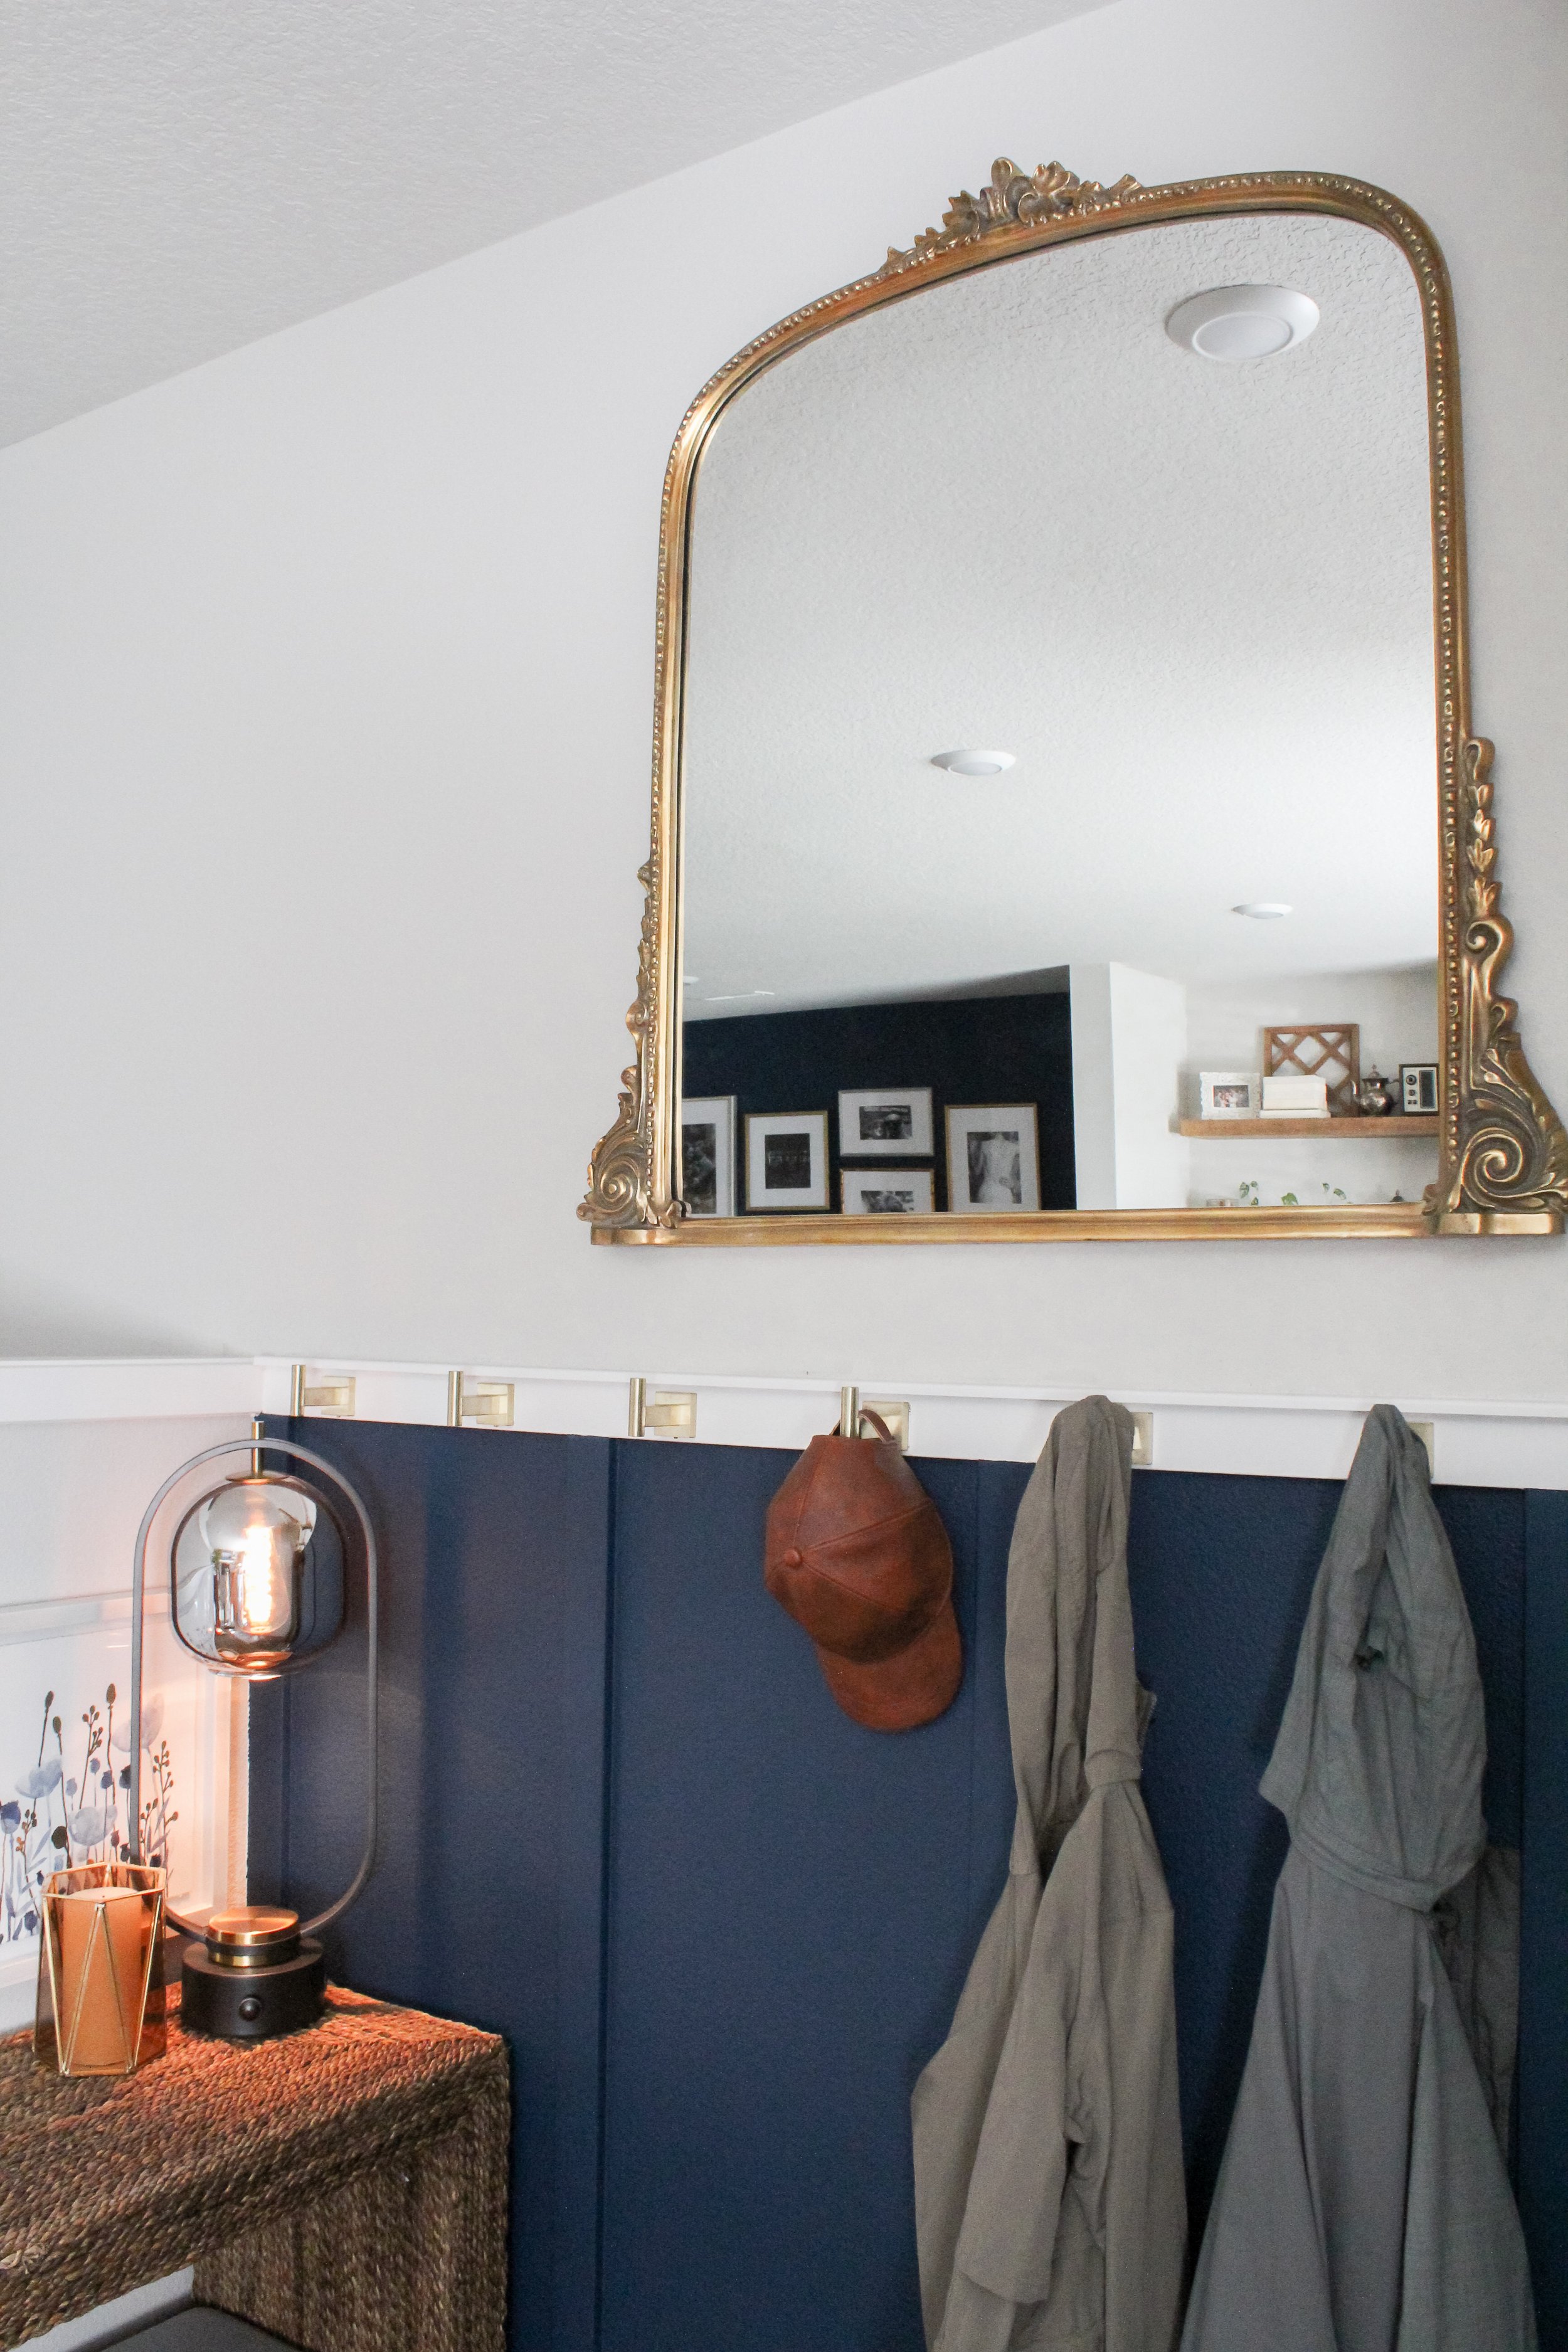
DIY Board & Batten Entryway
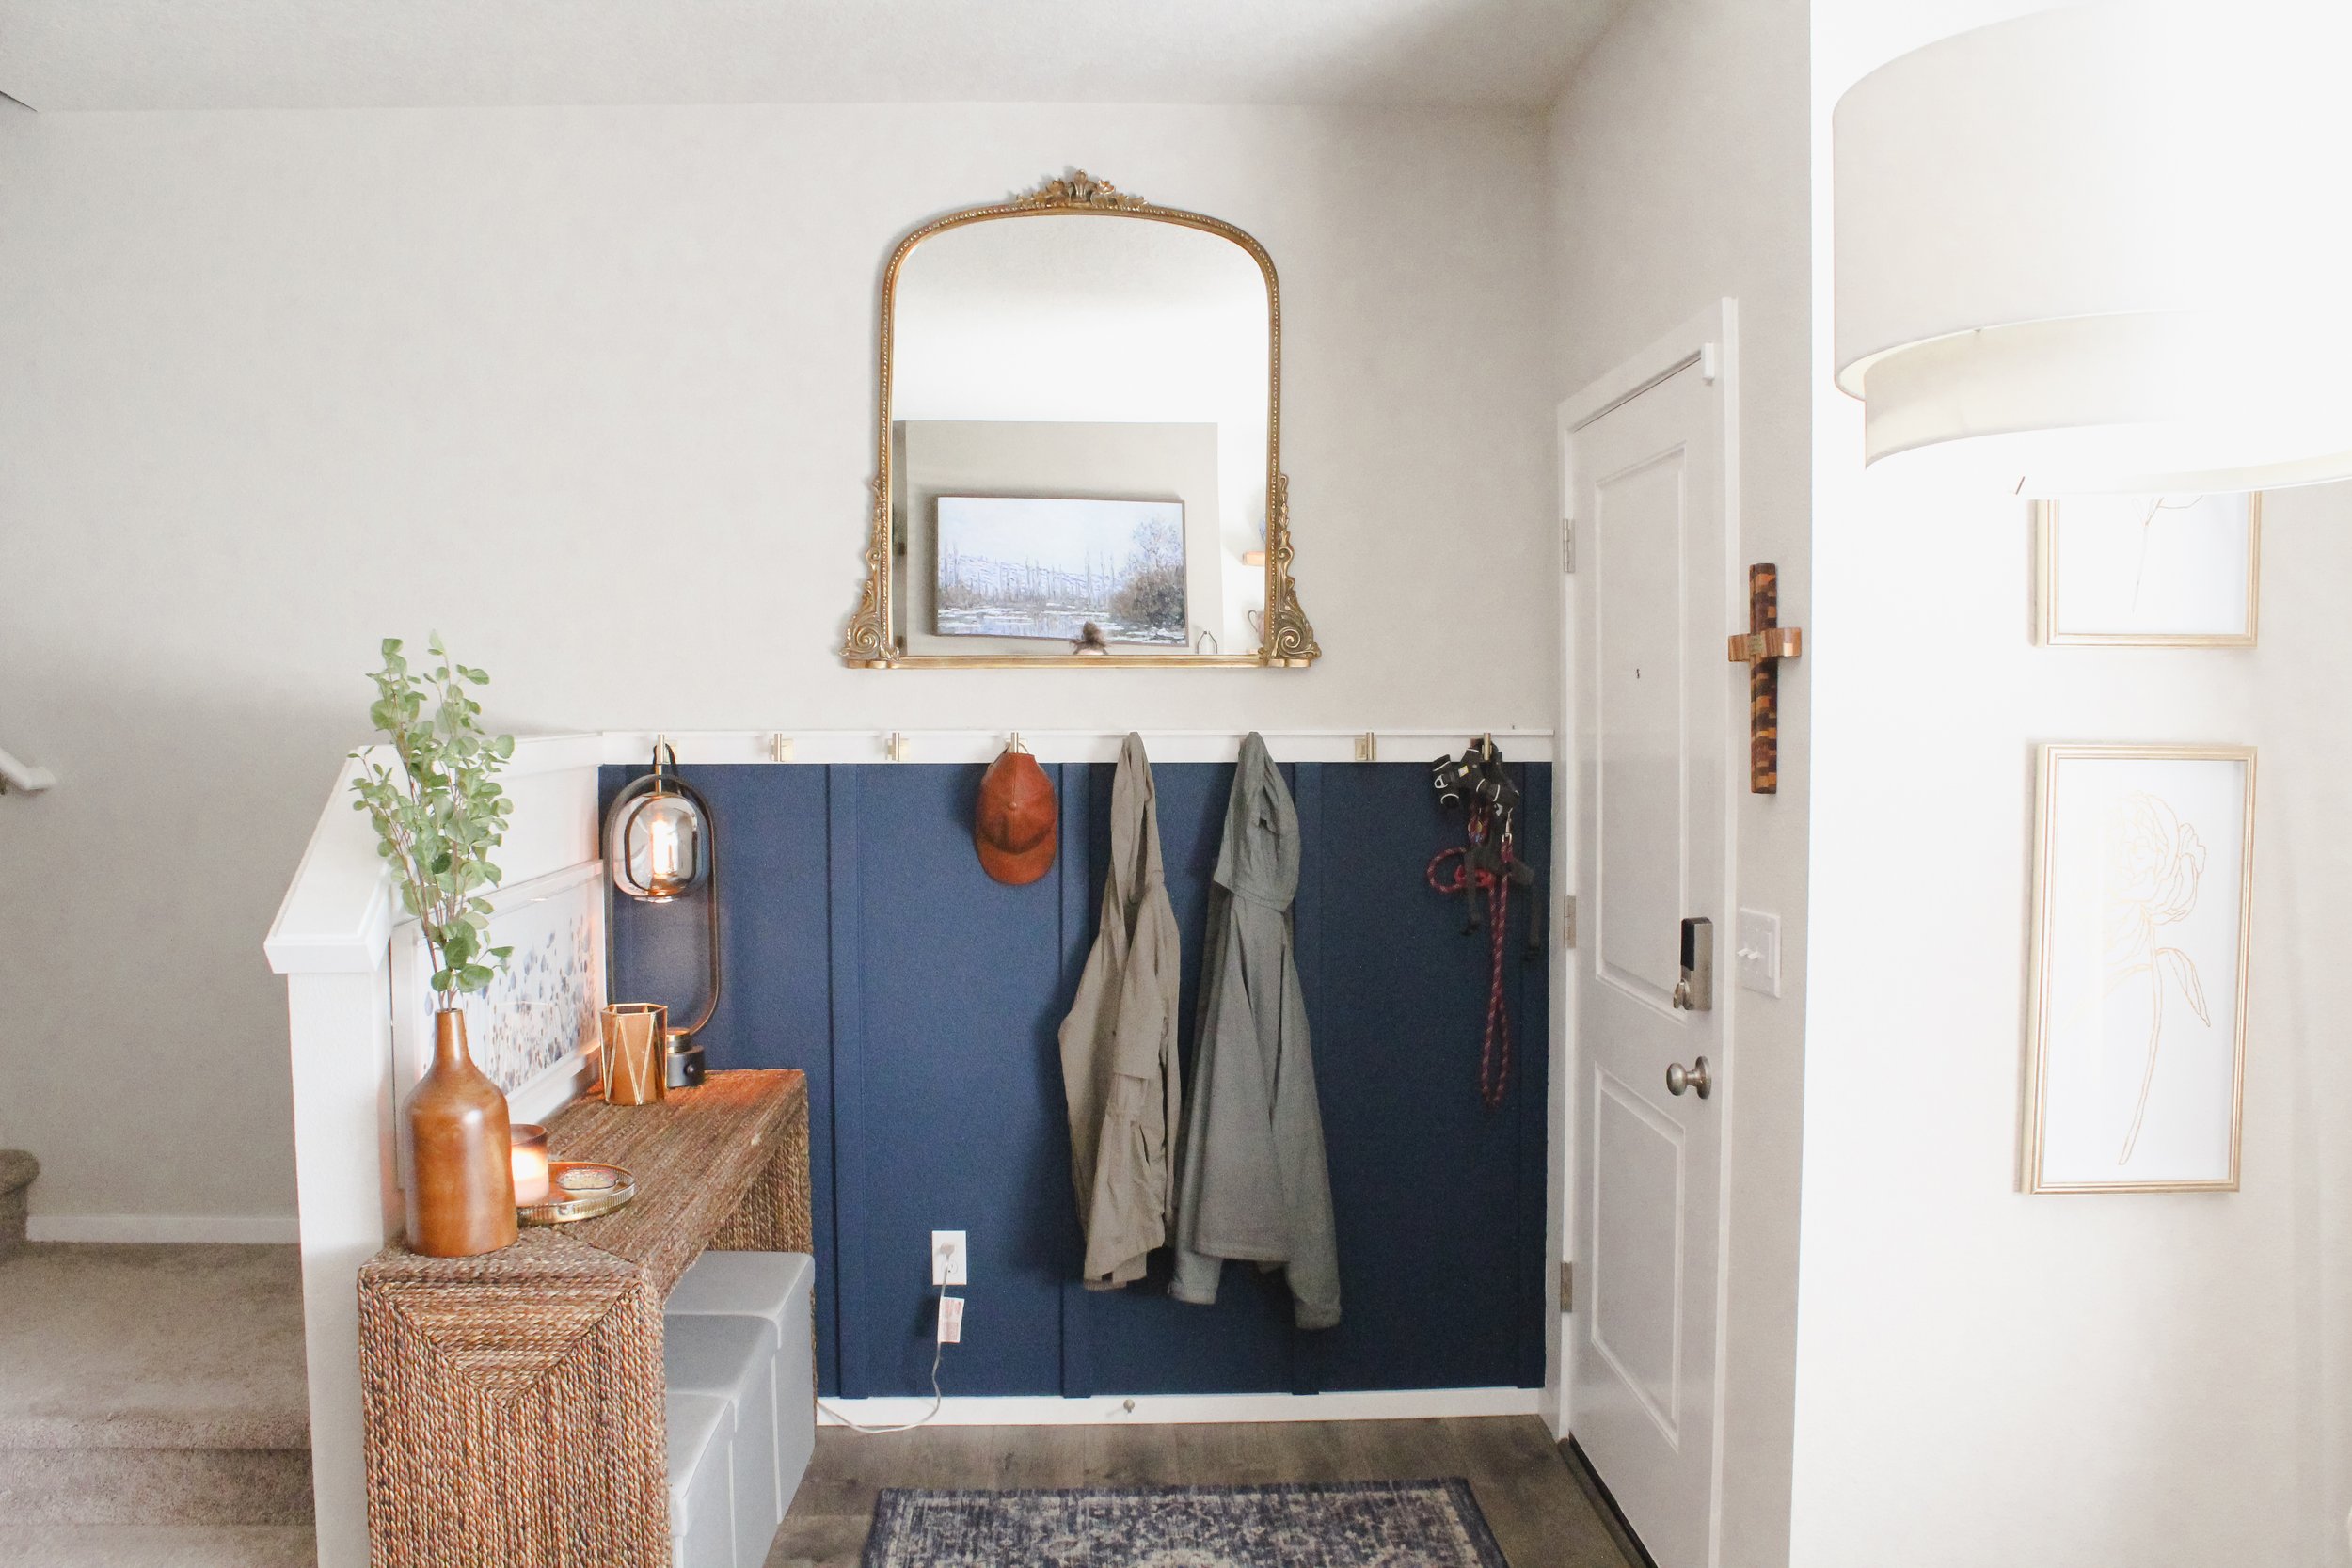
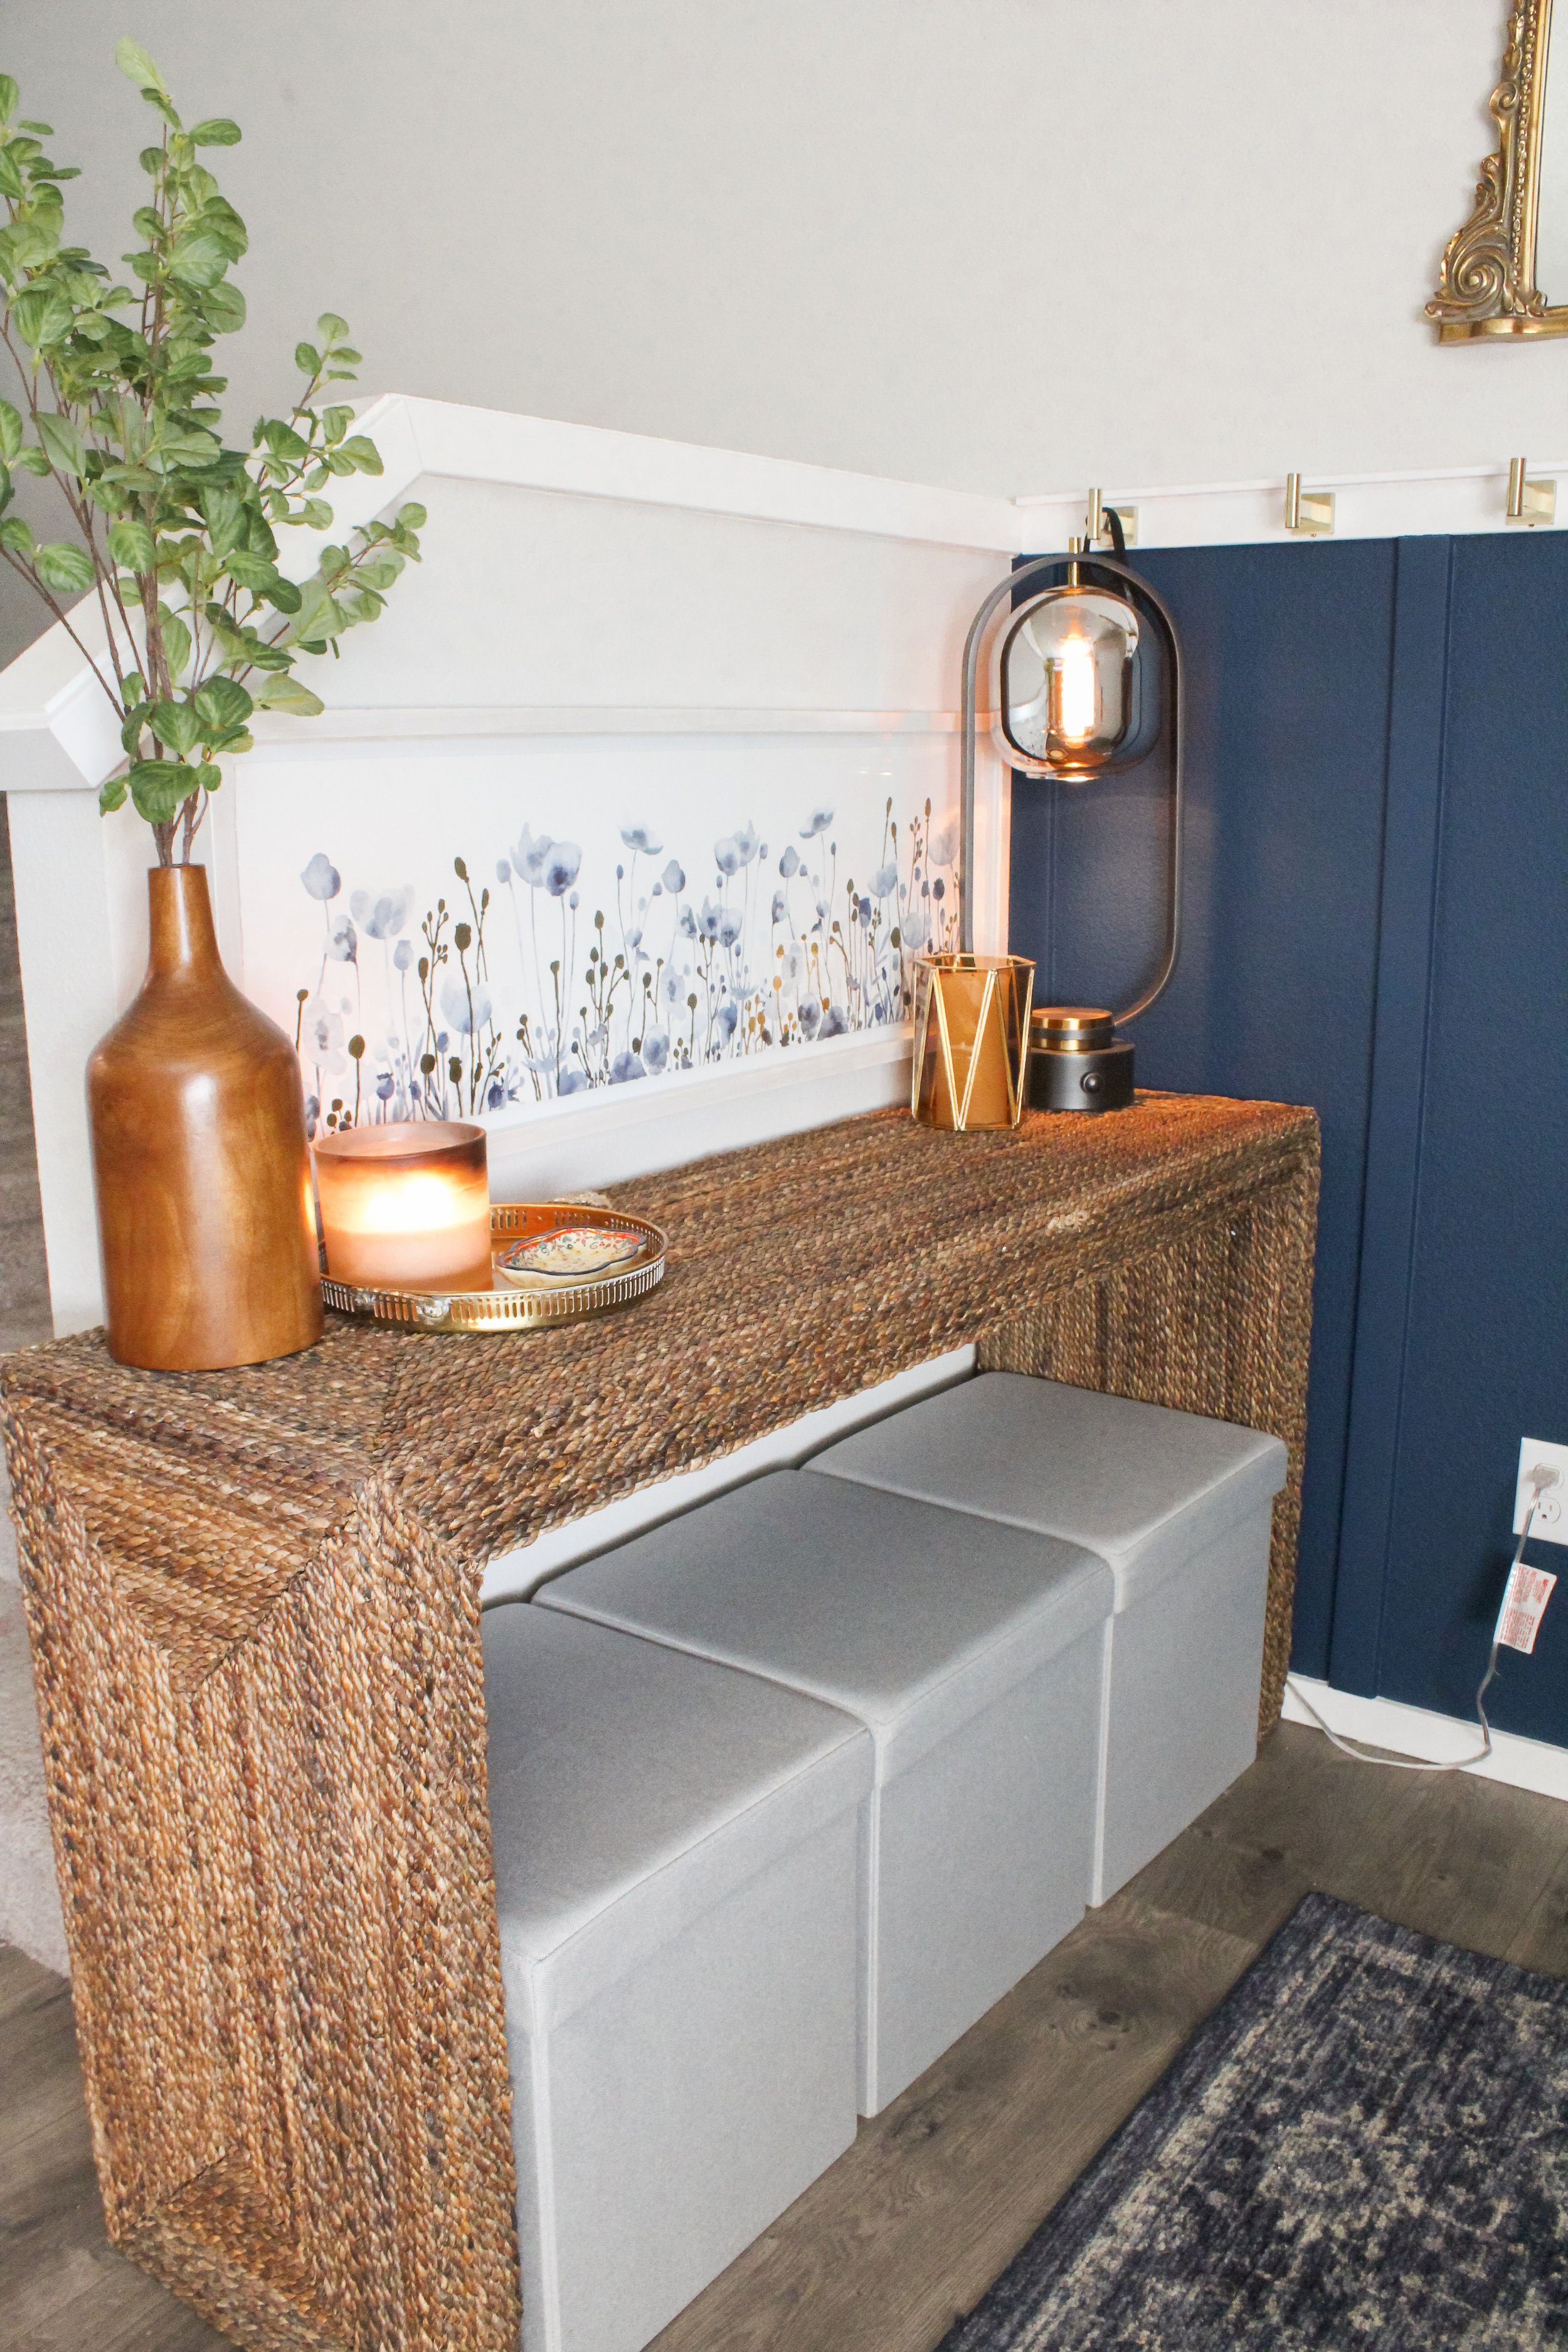
This DIY is one of my favorite projects we’ve done to-date. It totally elevated our entryway, all while making it so much more functional.

If you’ve ever lived in a home or apartment without a large entryway or coat closet near the entry, you know the struggle that is piled up coats, hats, umbrellas, and shoes — and it’s even worse if you have a dog with their leash, collar, doggie bags, and more.

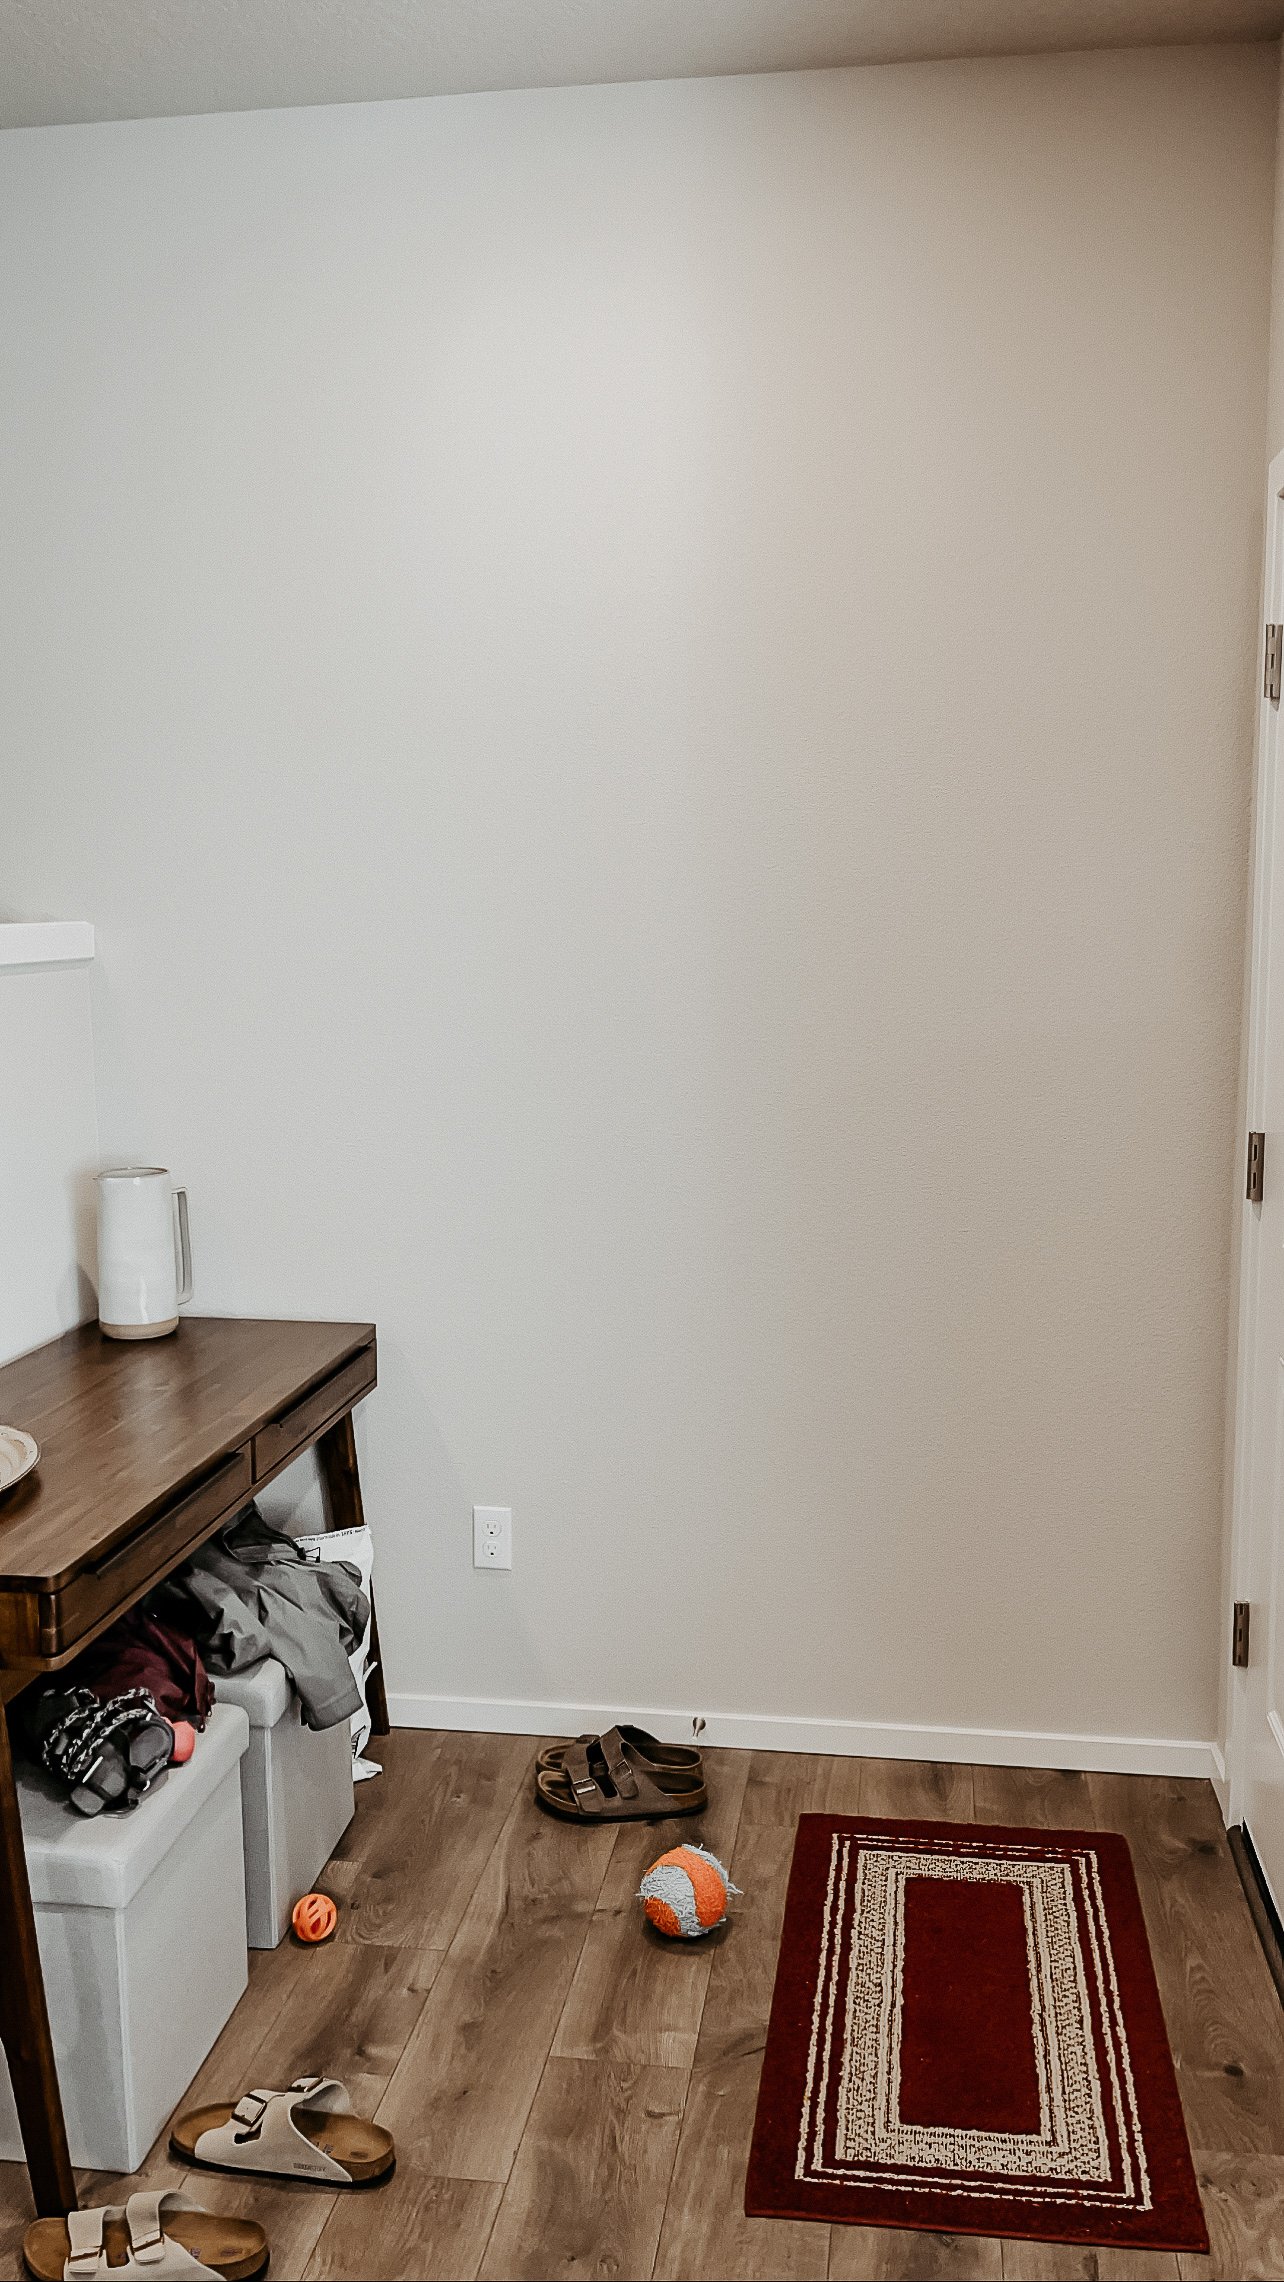
Well, we were definitely there 😅 For a while we had a not-so-cute coat rack and old hand-me-down bookshelf as placeholders until I figured out what I wanted to do with the space (and until we could budget funds to change it!). I think the before and after speaks for itself — so much more appealing to the eye!


the inspiration

This project vision started out when I saw this reel from someone I follow on Instagram. I immediately knew this was the perfect solve for our entryway! And it looked easy… but let me tell you, it was a lot more work than I thought 😂 But isn’t that always what happens with DIY projects?!

What made this project particularly difficult is that our house was built with some decorative trim on the stairwell, so we needed to match the width and depth of not only that trim, but also the existing baseboard to make sure the additional wood pieces weren’t sticking out from the wall at uneven depths. So it took us a good while at home depot to even find the right trim size and then when we did, it was pre-painted, which wasn’t ideal since we then needed to sand them all and re-paint to match our wall color on some pieces, and our trim color on others. Unless you can find the exact right color on pre-painted wood, I’d always recommend finding raw wood pieces so you save yourself from having to sand, which was by far the most time-consuming and annoying part of the process.

We didn’t have really any tools we needed for this project, but we knew we wanted to continue to do more house projects in the future, so we decided to invest in a few tools we knew we’d use again and again.


the tools

Of course, you’ll need your trim/boards and paint of choice, but you’ll also benefit from some tools. From left to right:

  1. Brad Nailer (one of my favorite tools! easily nails trim into walls without leaving much of a trace)

  2. Electric Sander (so much faster than hand sanding with paper!)

  3. Circular Saw (to cut down your trim/boards to perfect size)

  4. Liquid Nails (put this on the back of the boards first and then use the brad nailer to fully secure them)

  5. Caulking (this helps cover up the nails from the Brad Nailer and is also used to fill in gaps along the sides and top/bottom of the boards to create a cohesive look from board to wall. A little goes a long way!)

  6. Level (to make sure your boards are straight!)

  7. Caulking gun (makes application easier and can be used for both liquid nails and caulking!)


the process

Once all the boards were cut down to perfect size, it felt like the project was on a roll. The process we followed was:
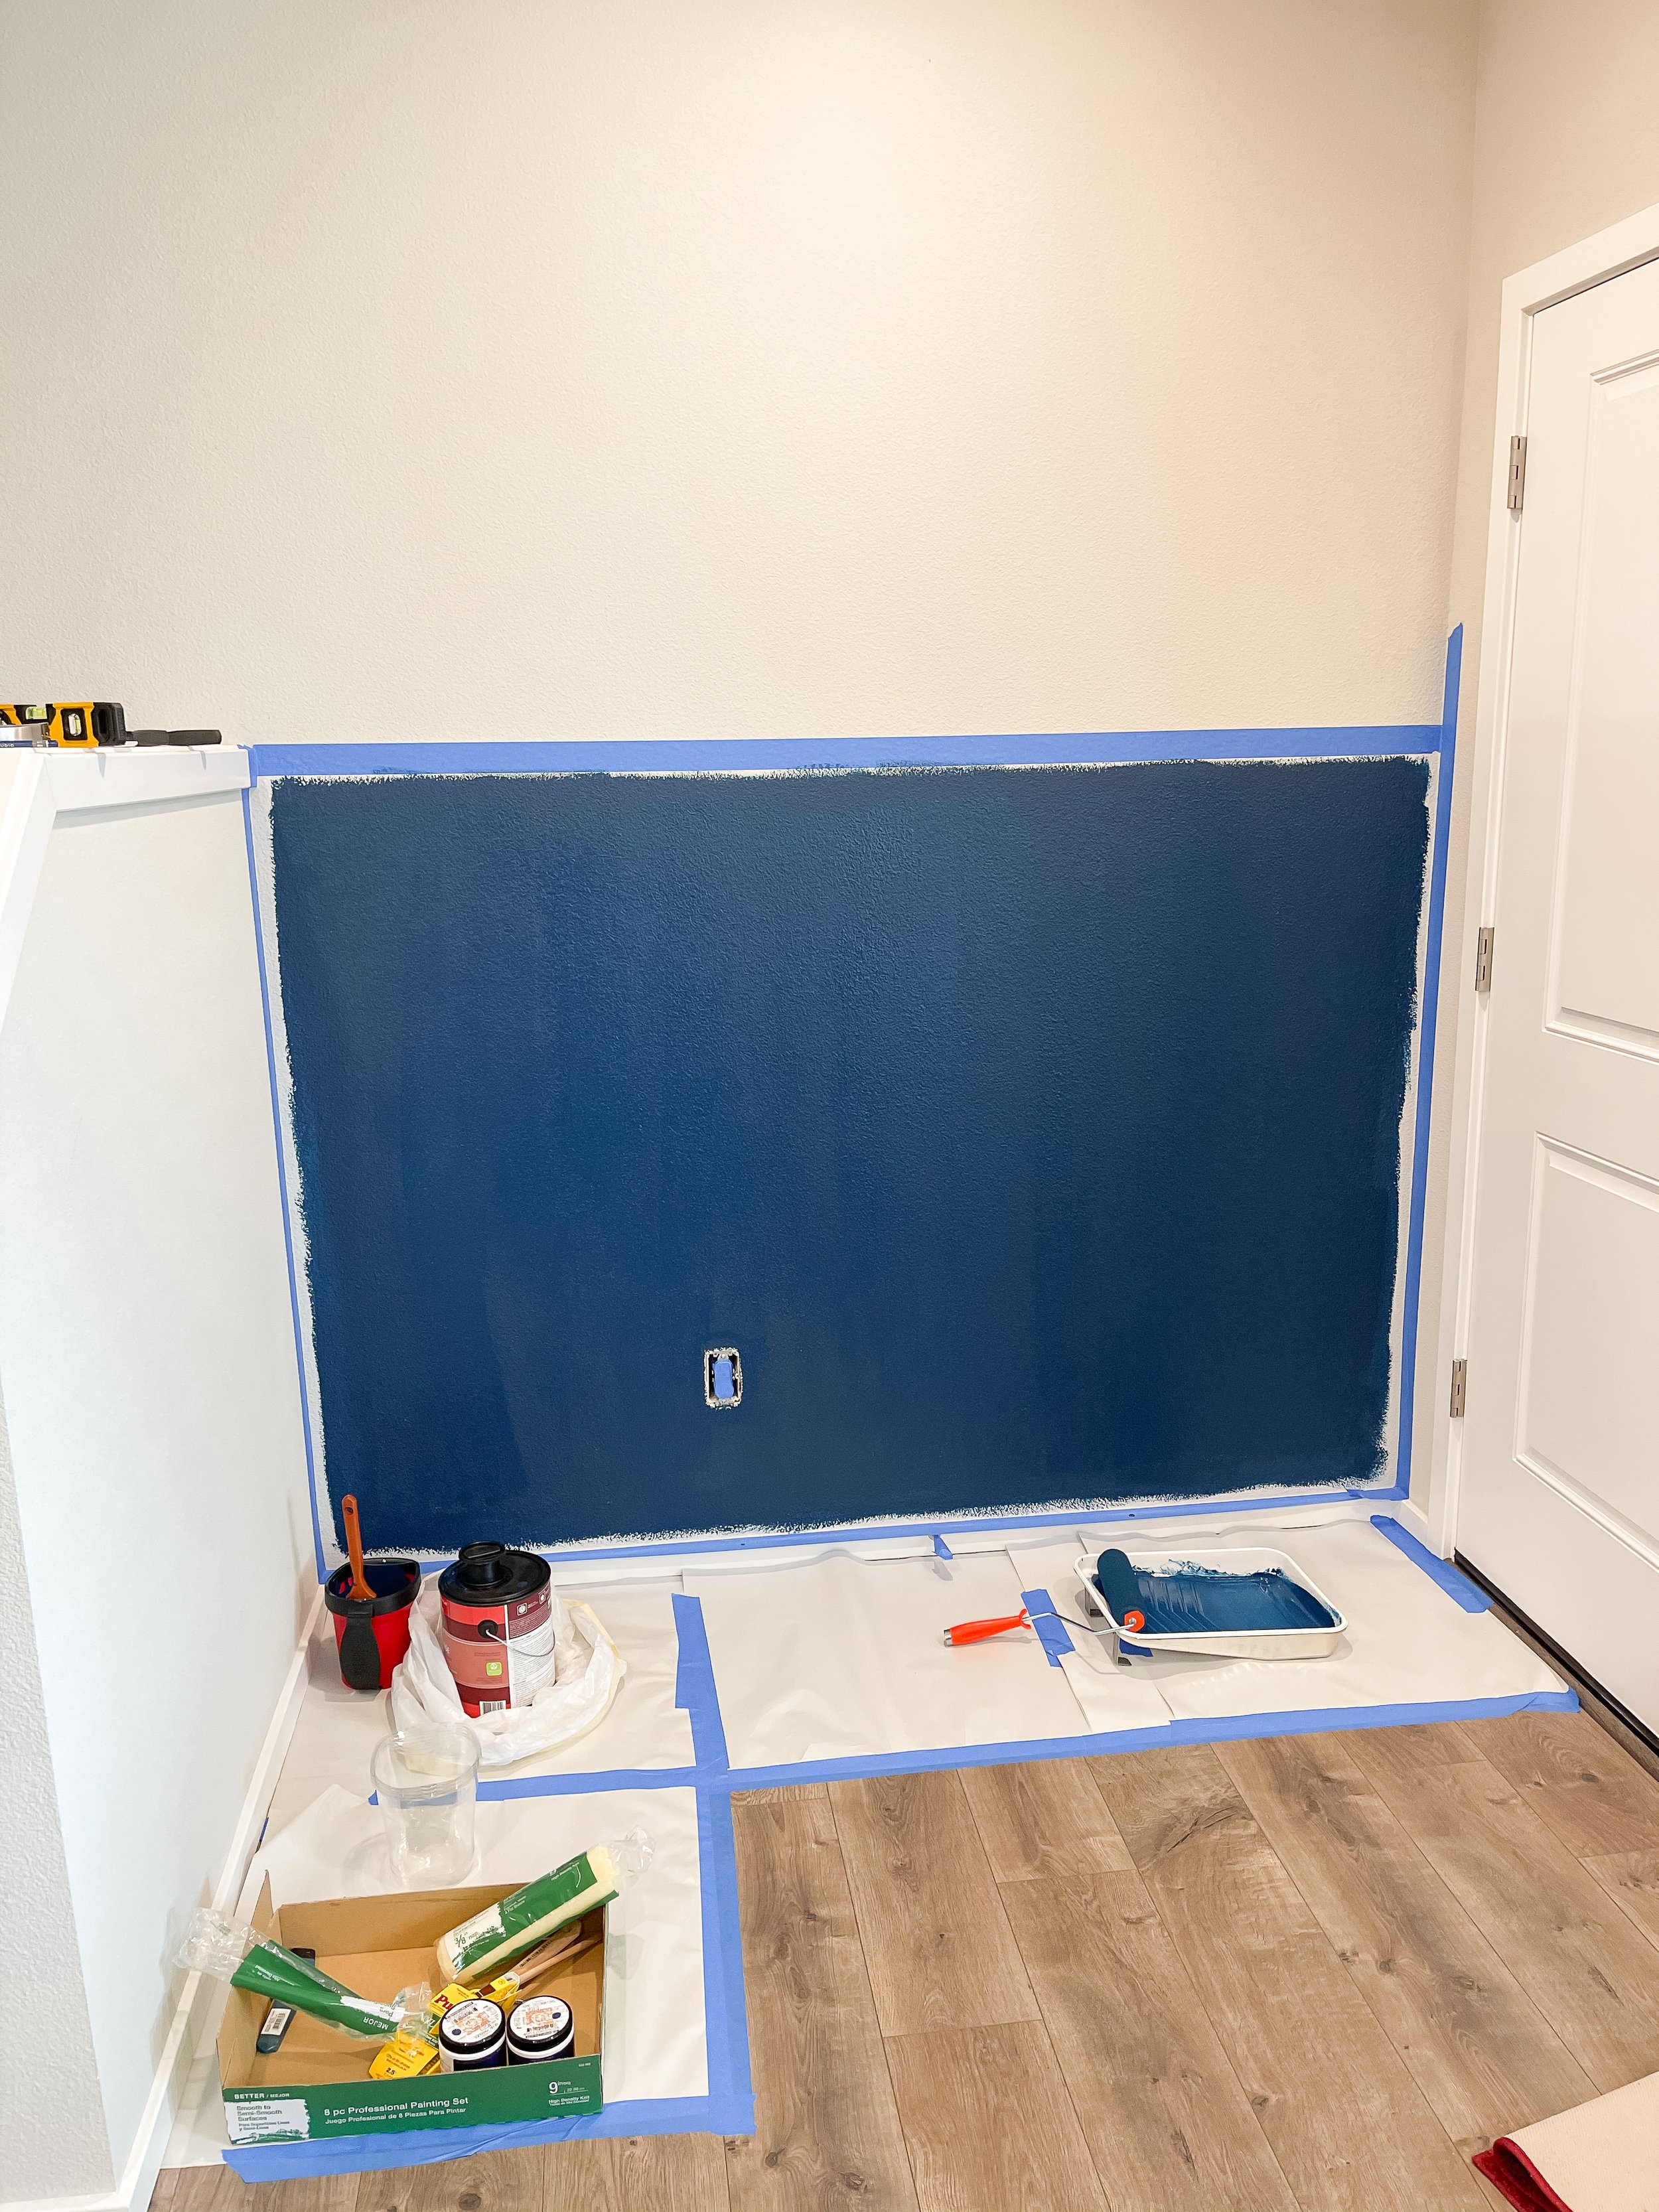
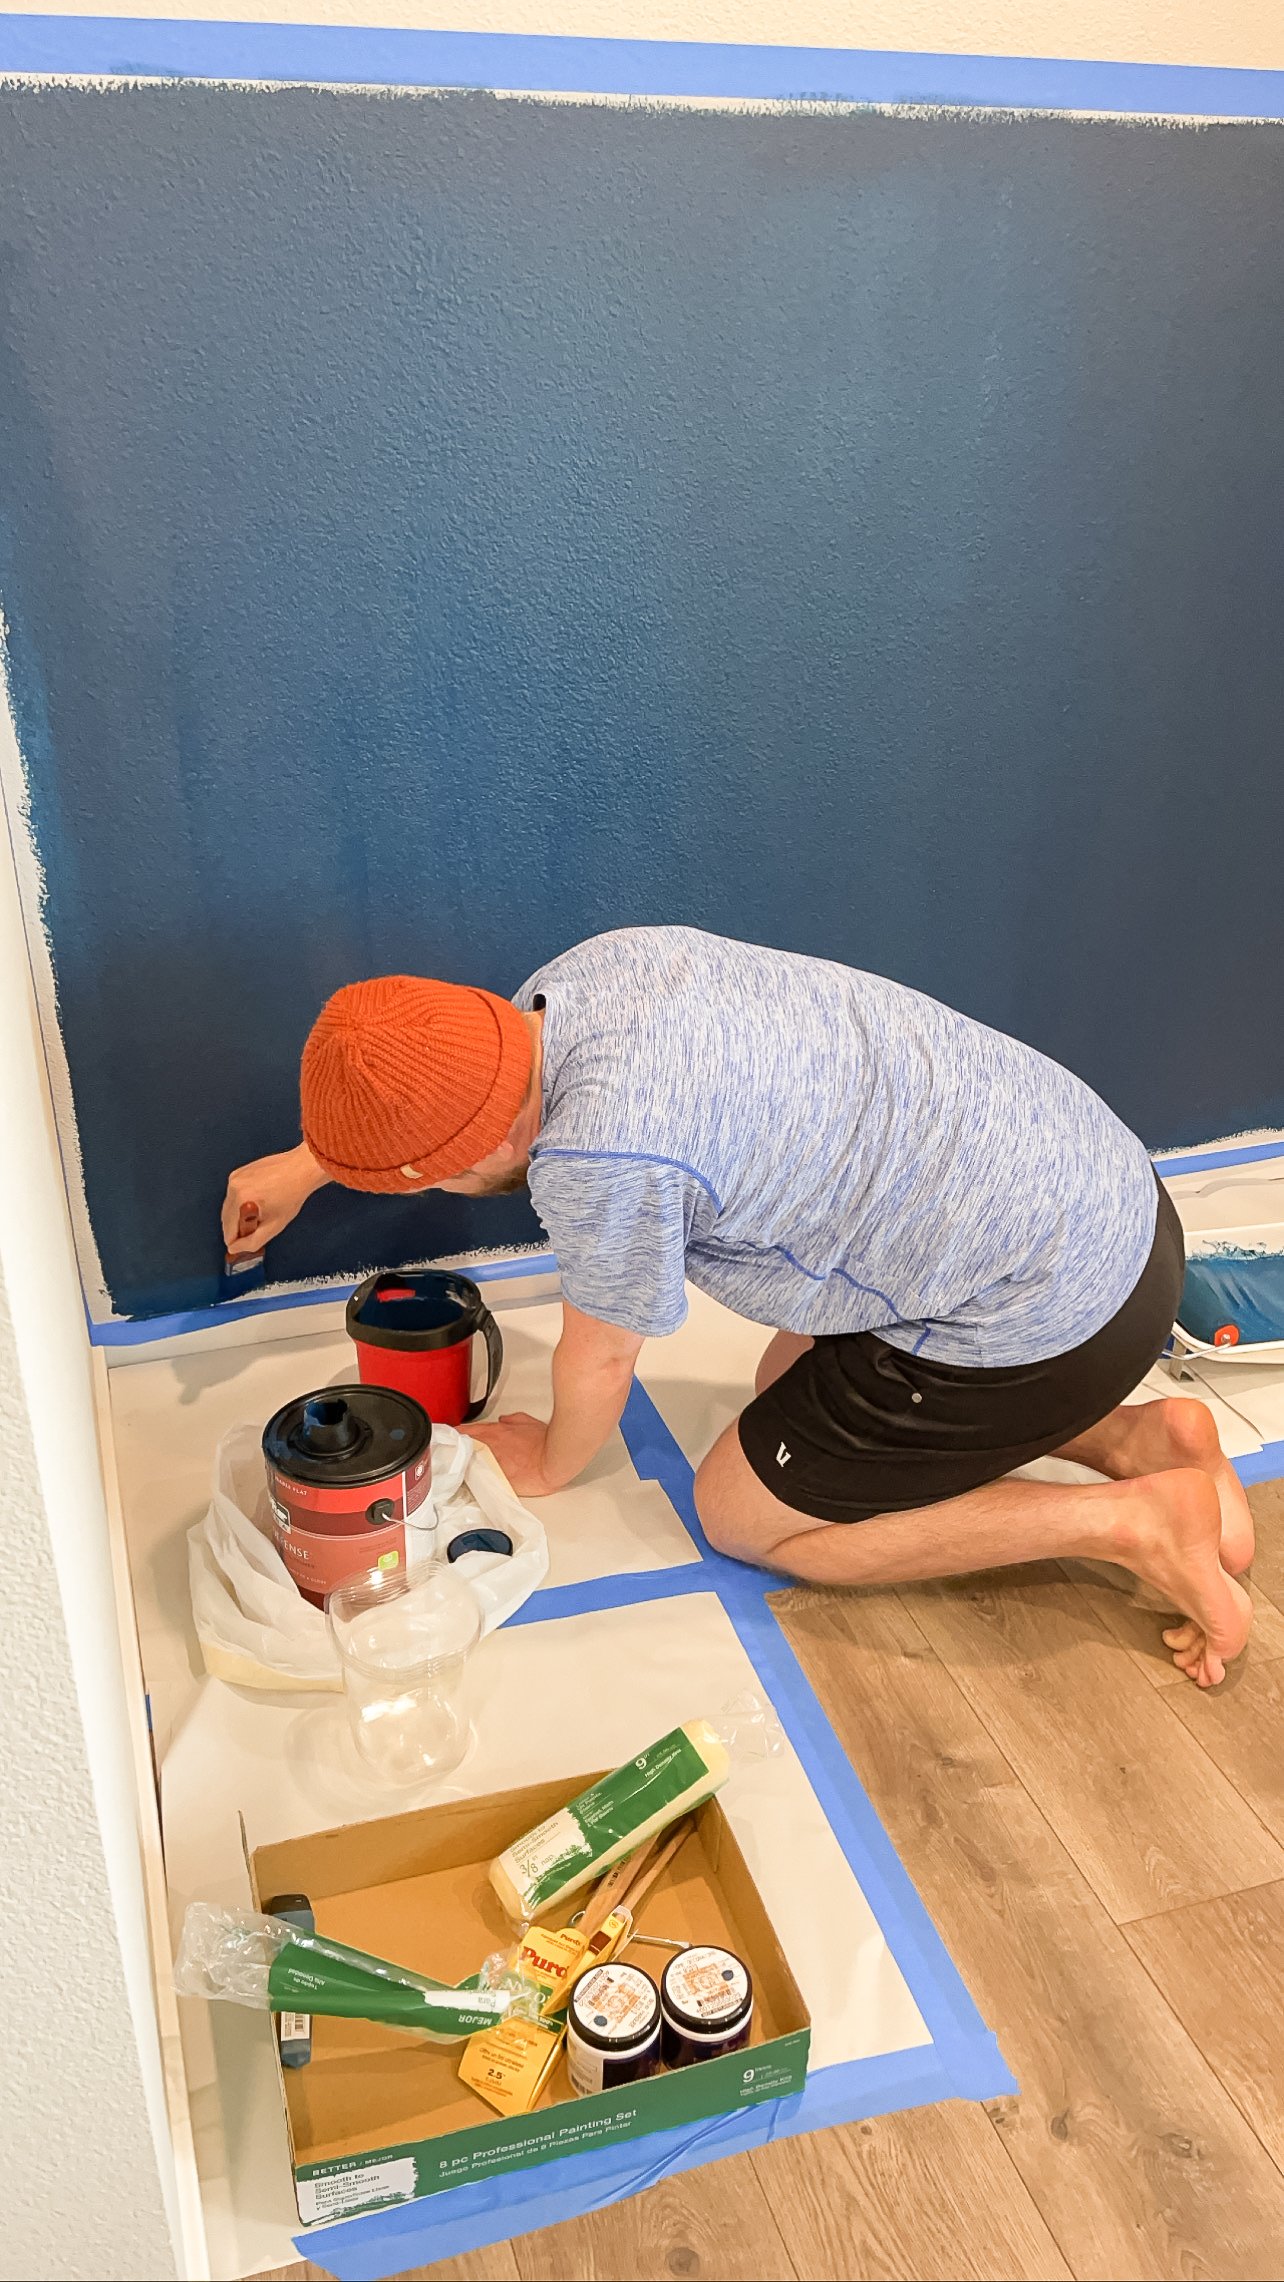
  1. Paint the wall

  2. Cut down the boards to size

  3. Sand all the boards

  4. Secure boards to wall with Liquid Nails and then Brad Nailer

  5. Paint all boards after they’re on the wall

  6. Caulk over the nails and on all sides

  7. Paint touch-ups

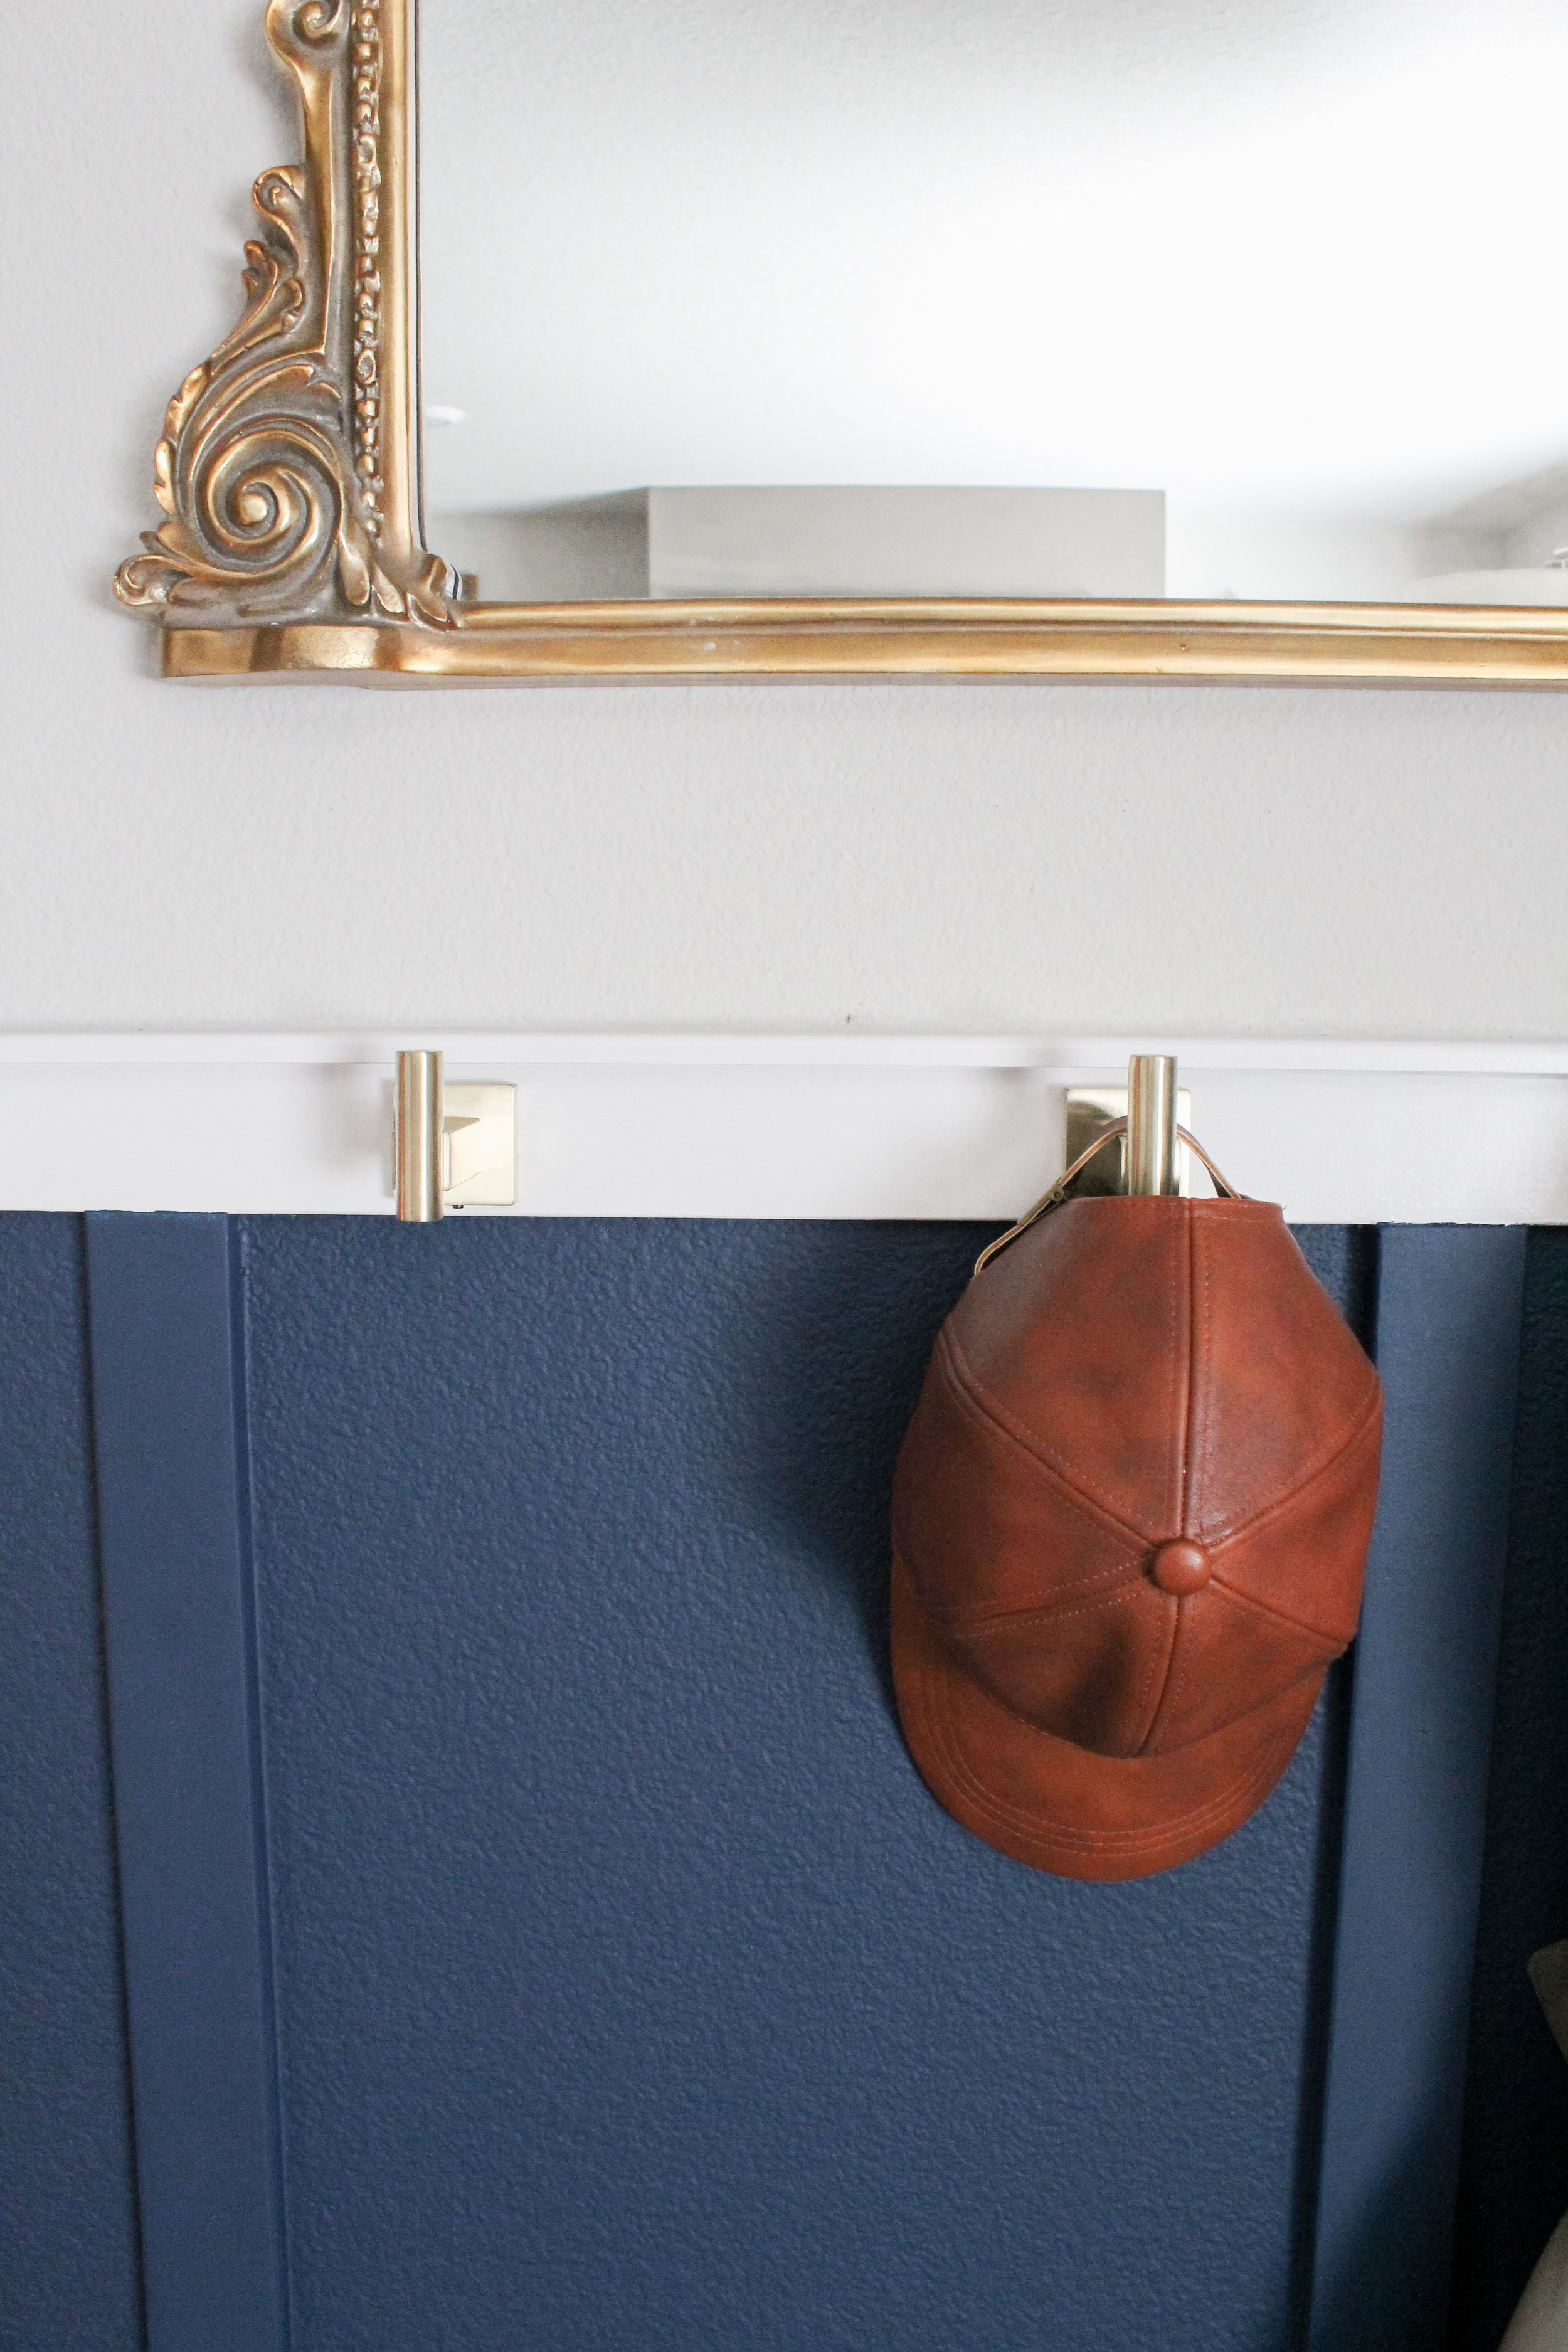
  8. Add the decorative hooks

  9. Done!

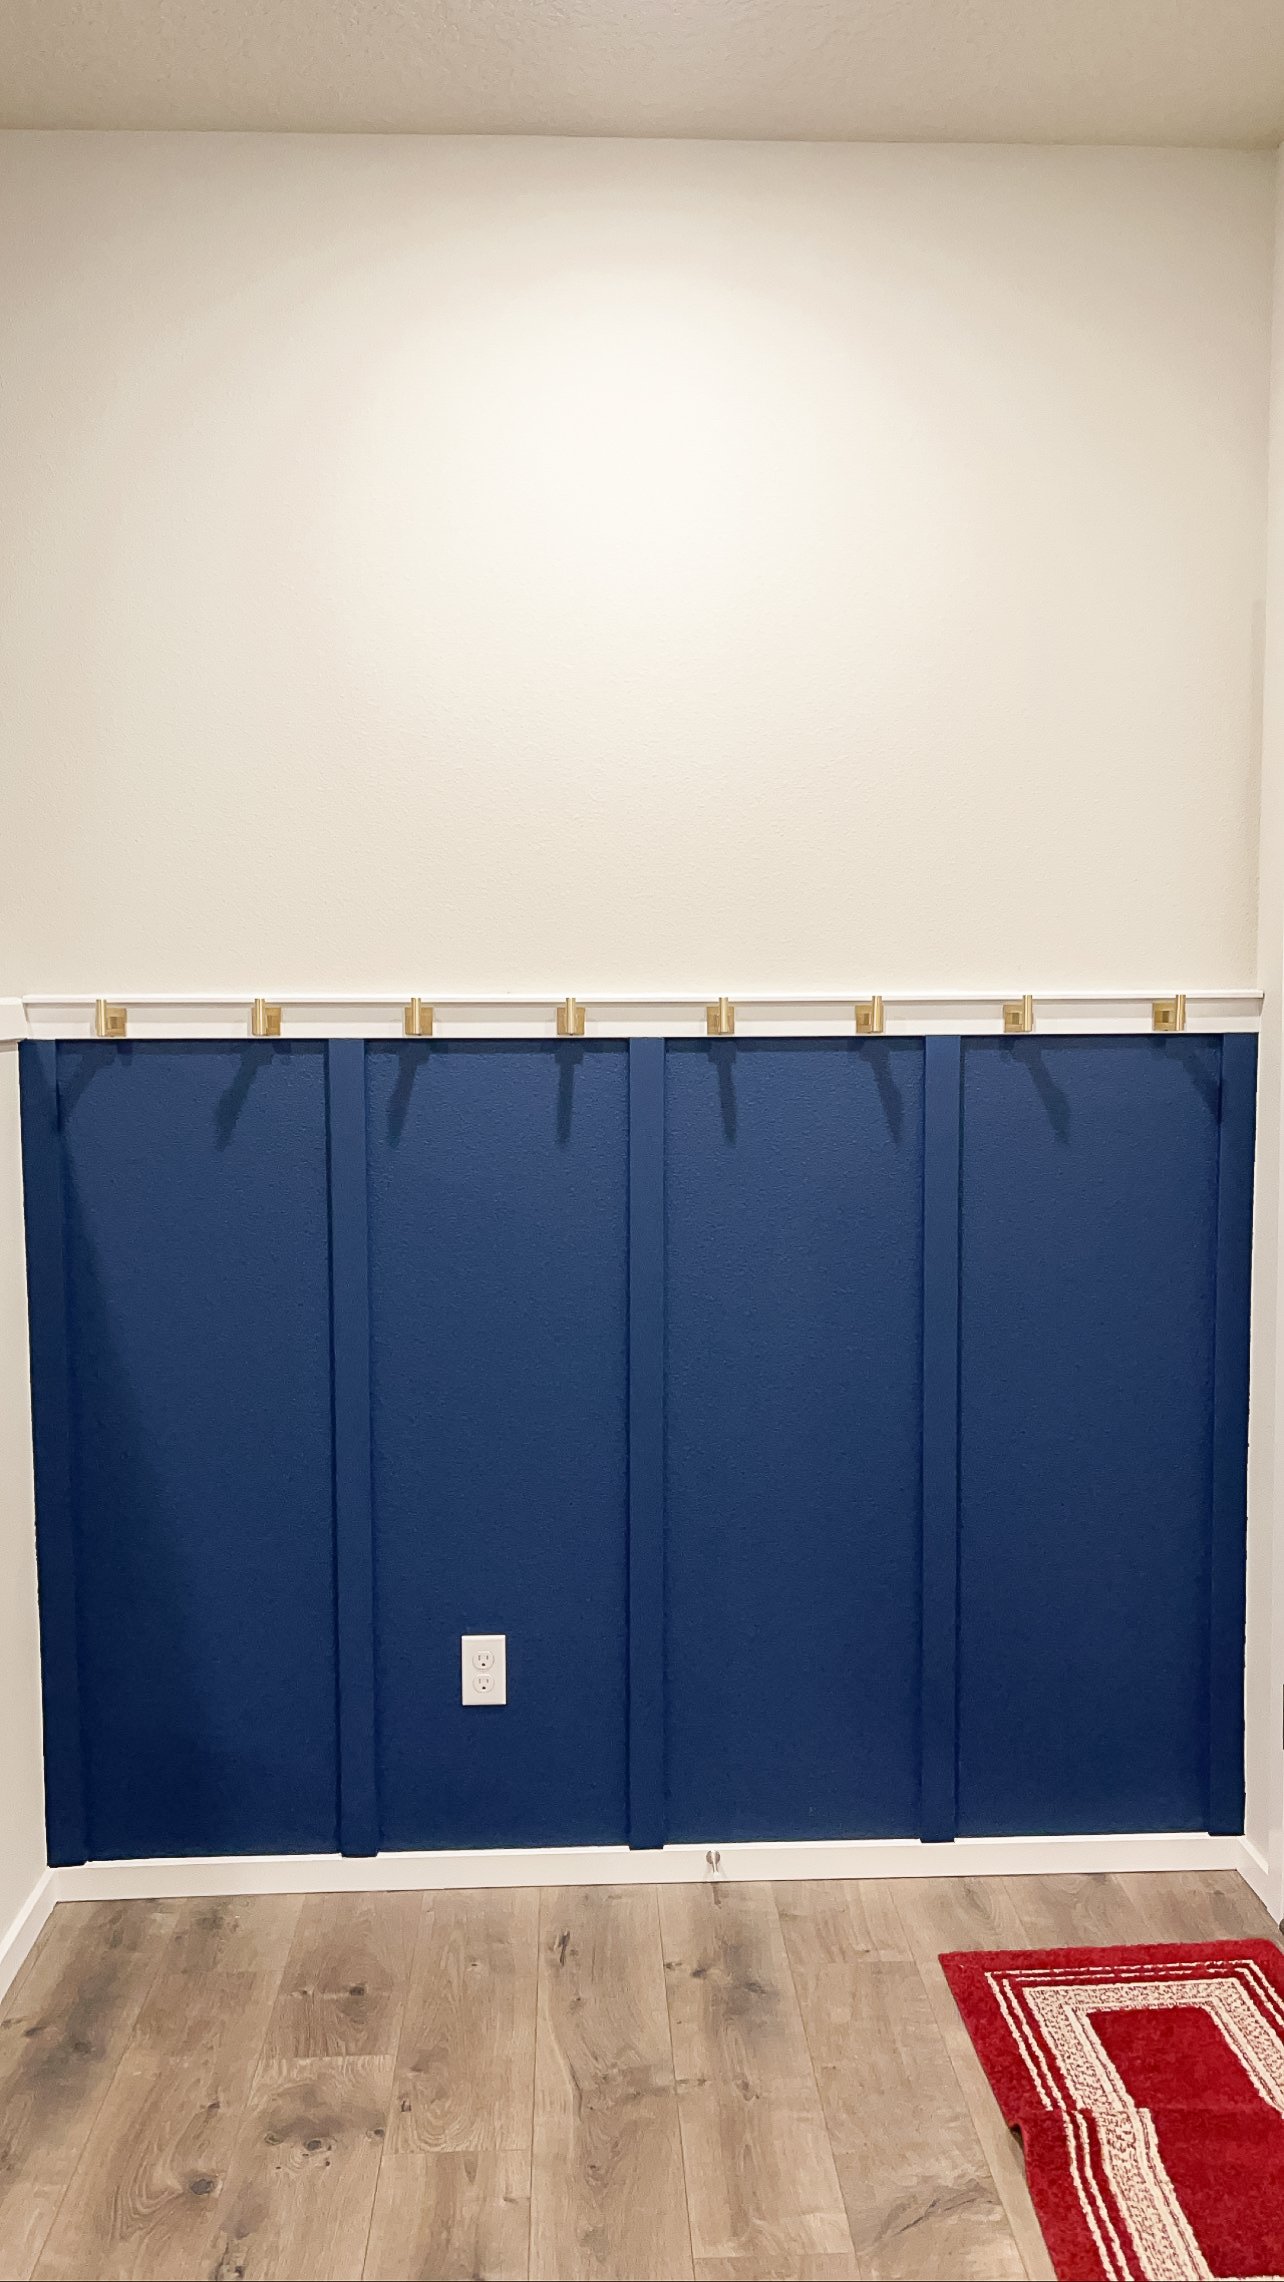
One of the hardest decisions, aside from figuring out the best trim boards to match what was already in our house, was the paint color for the top board! In the initial video I was inspired by, she painted all the boards the same color as the part of the wall behind them, which made for a really cool cohesive look. BUT, I knew I wanted to keep the baseboard the same color as the rest of the downstairs for consistency, so there was already one part that was going to be different from the blue.

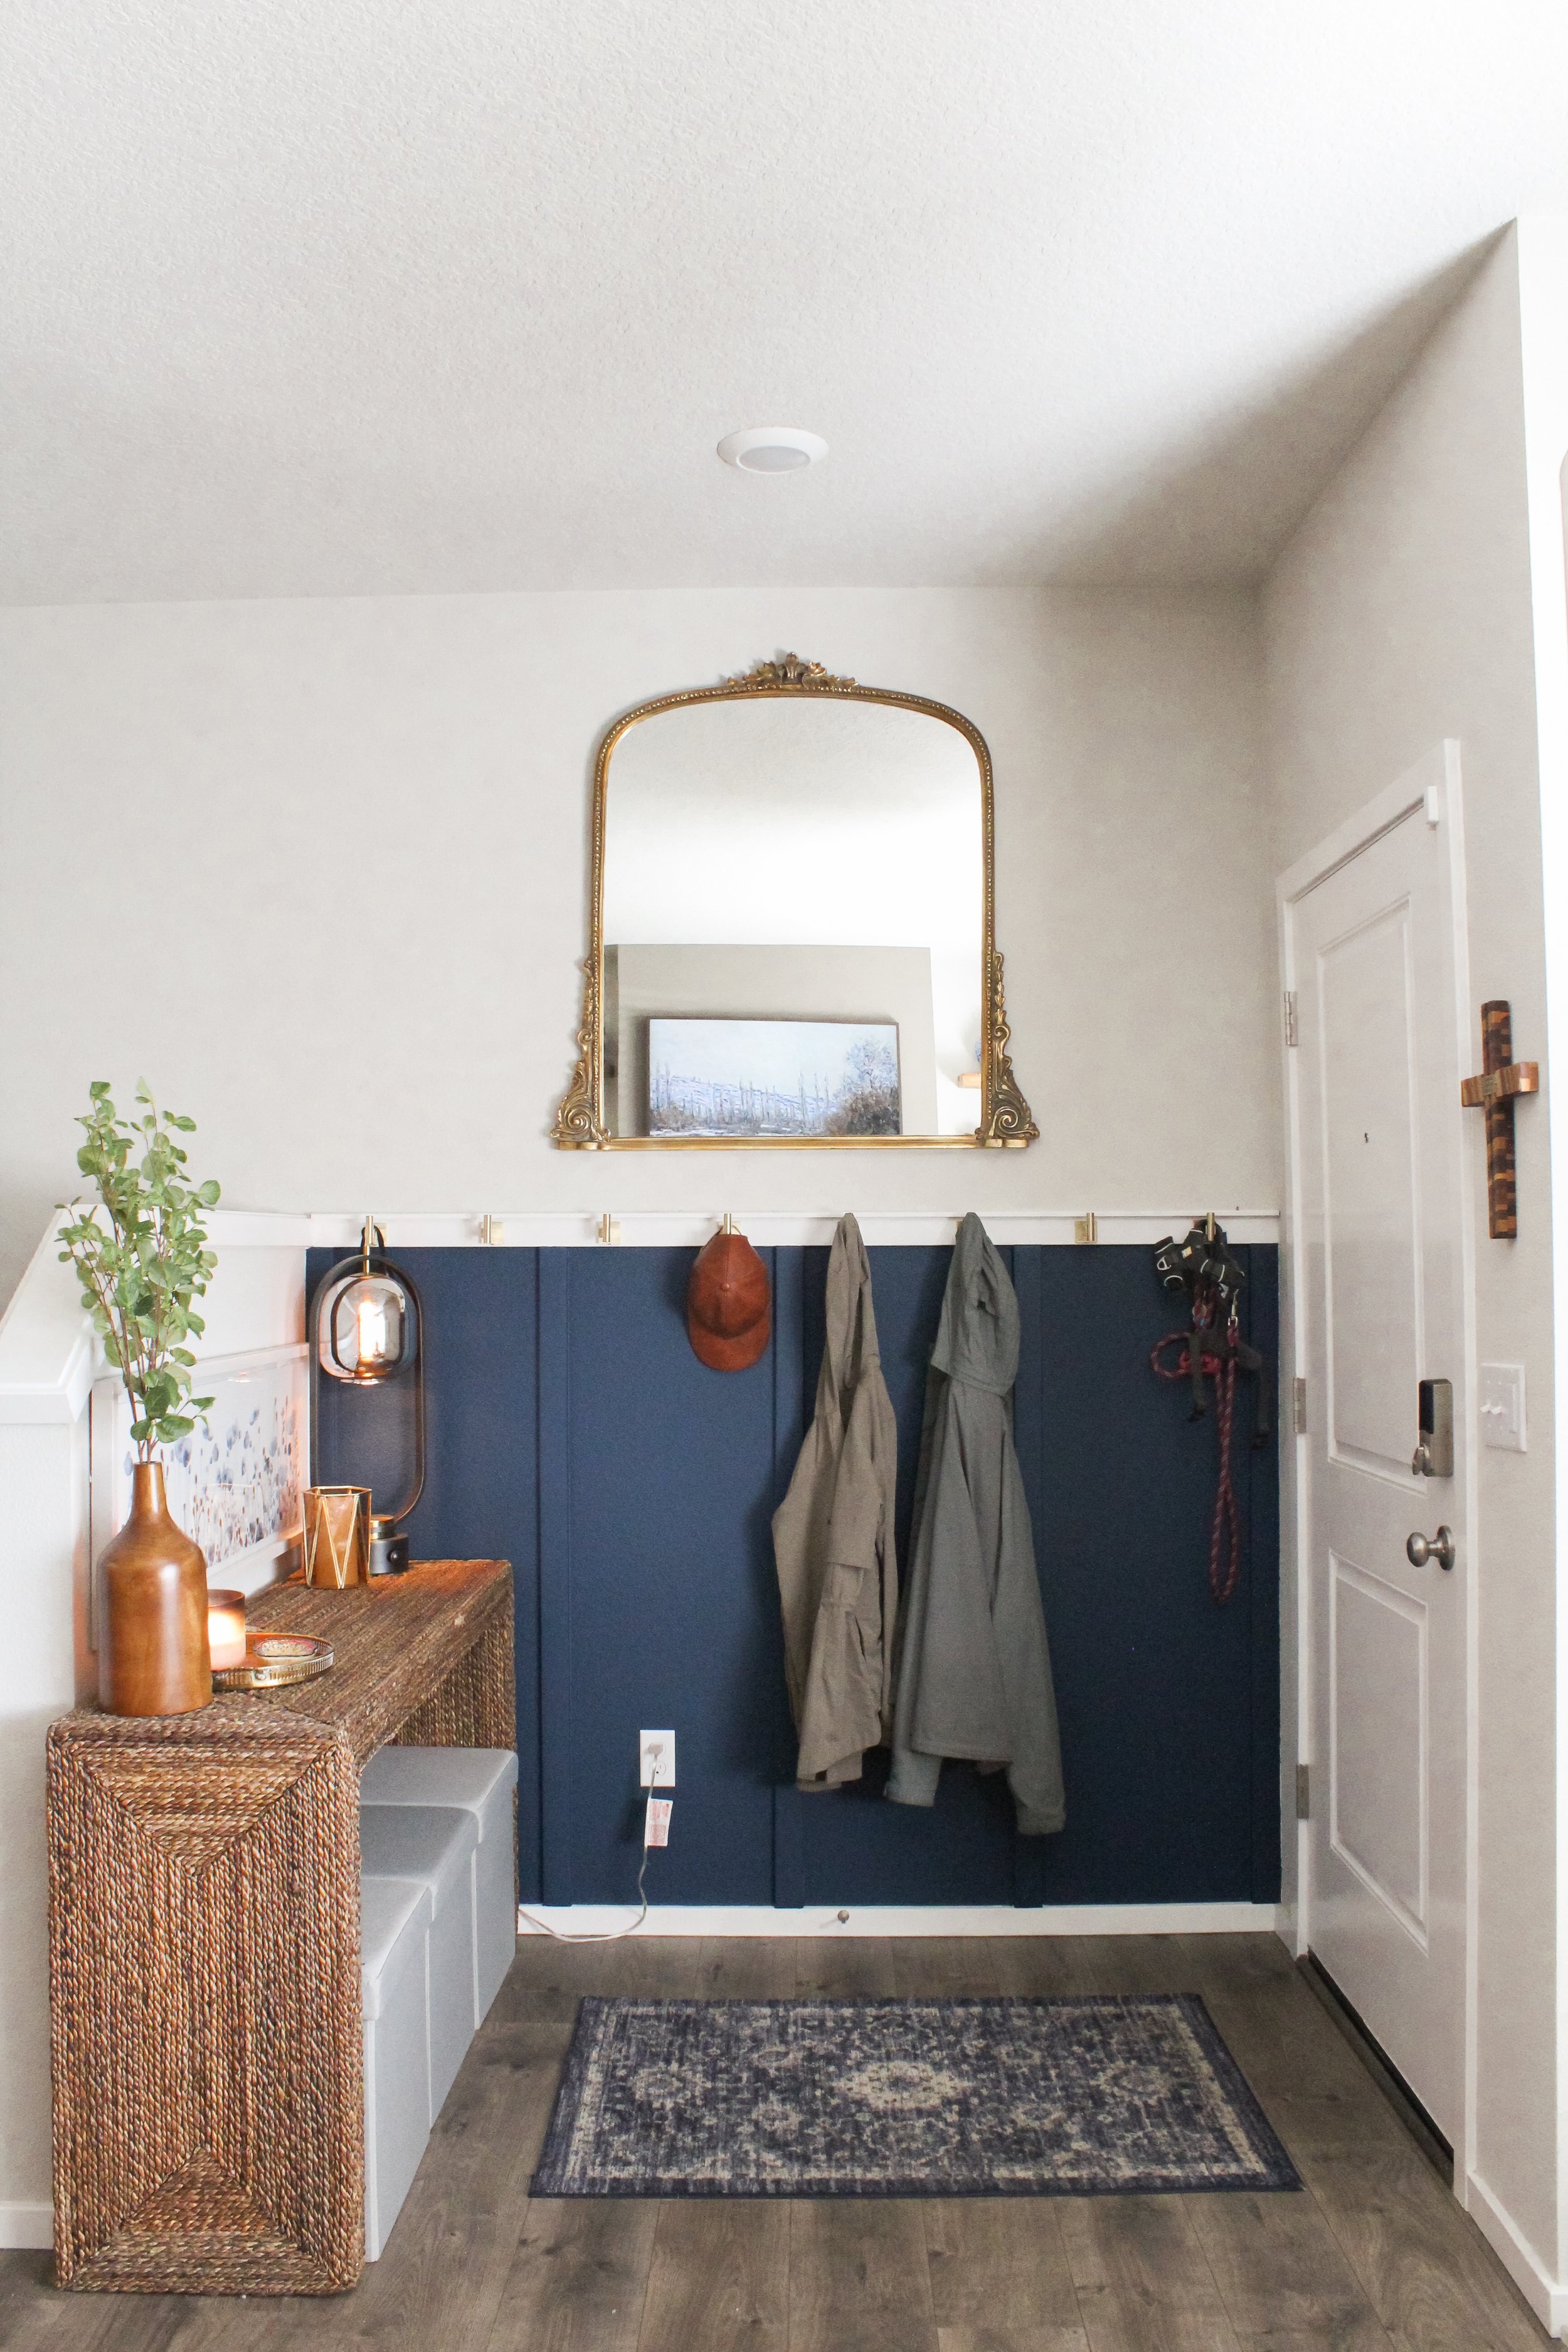
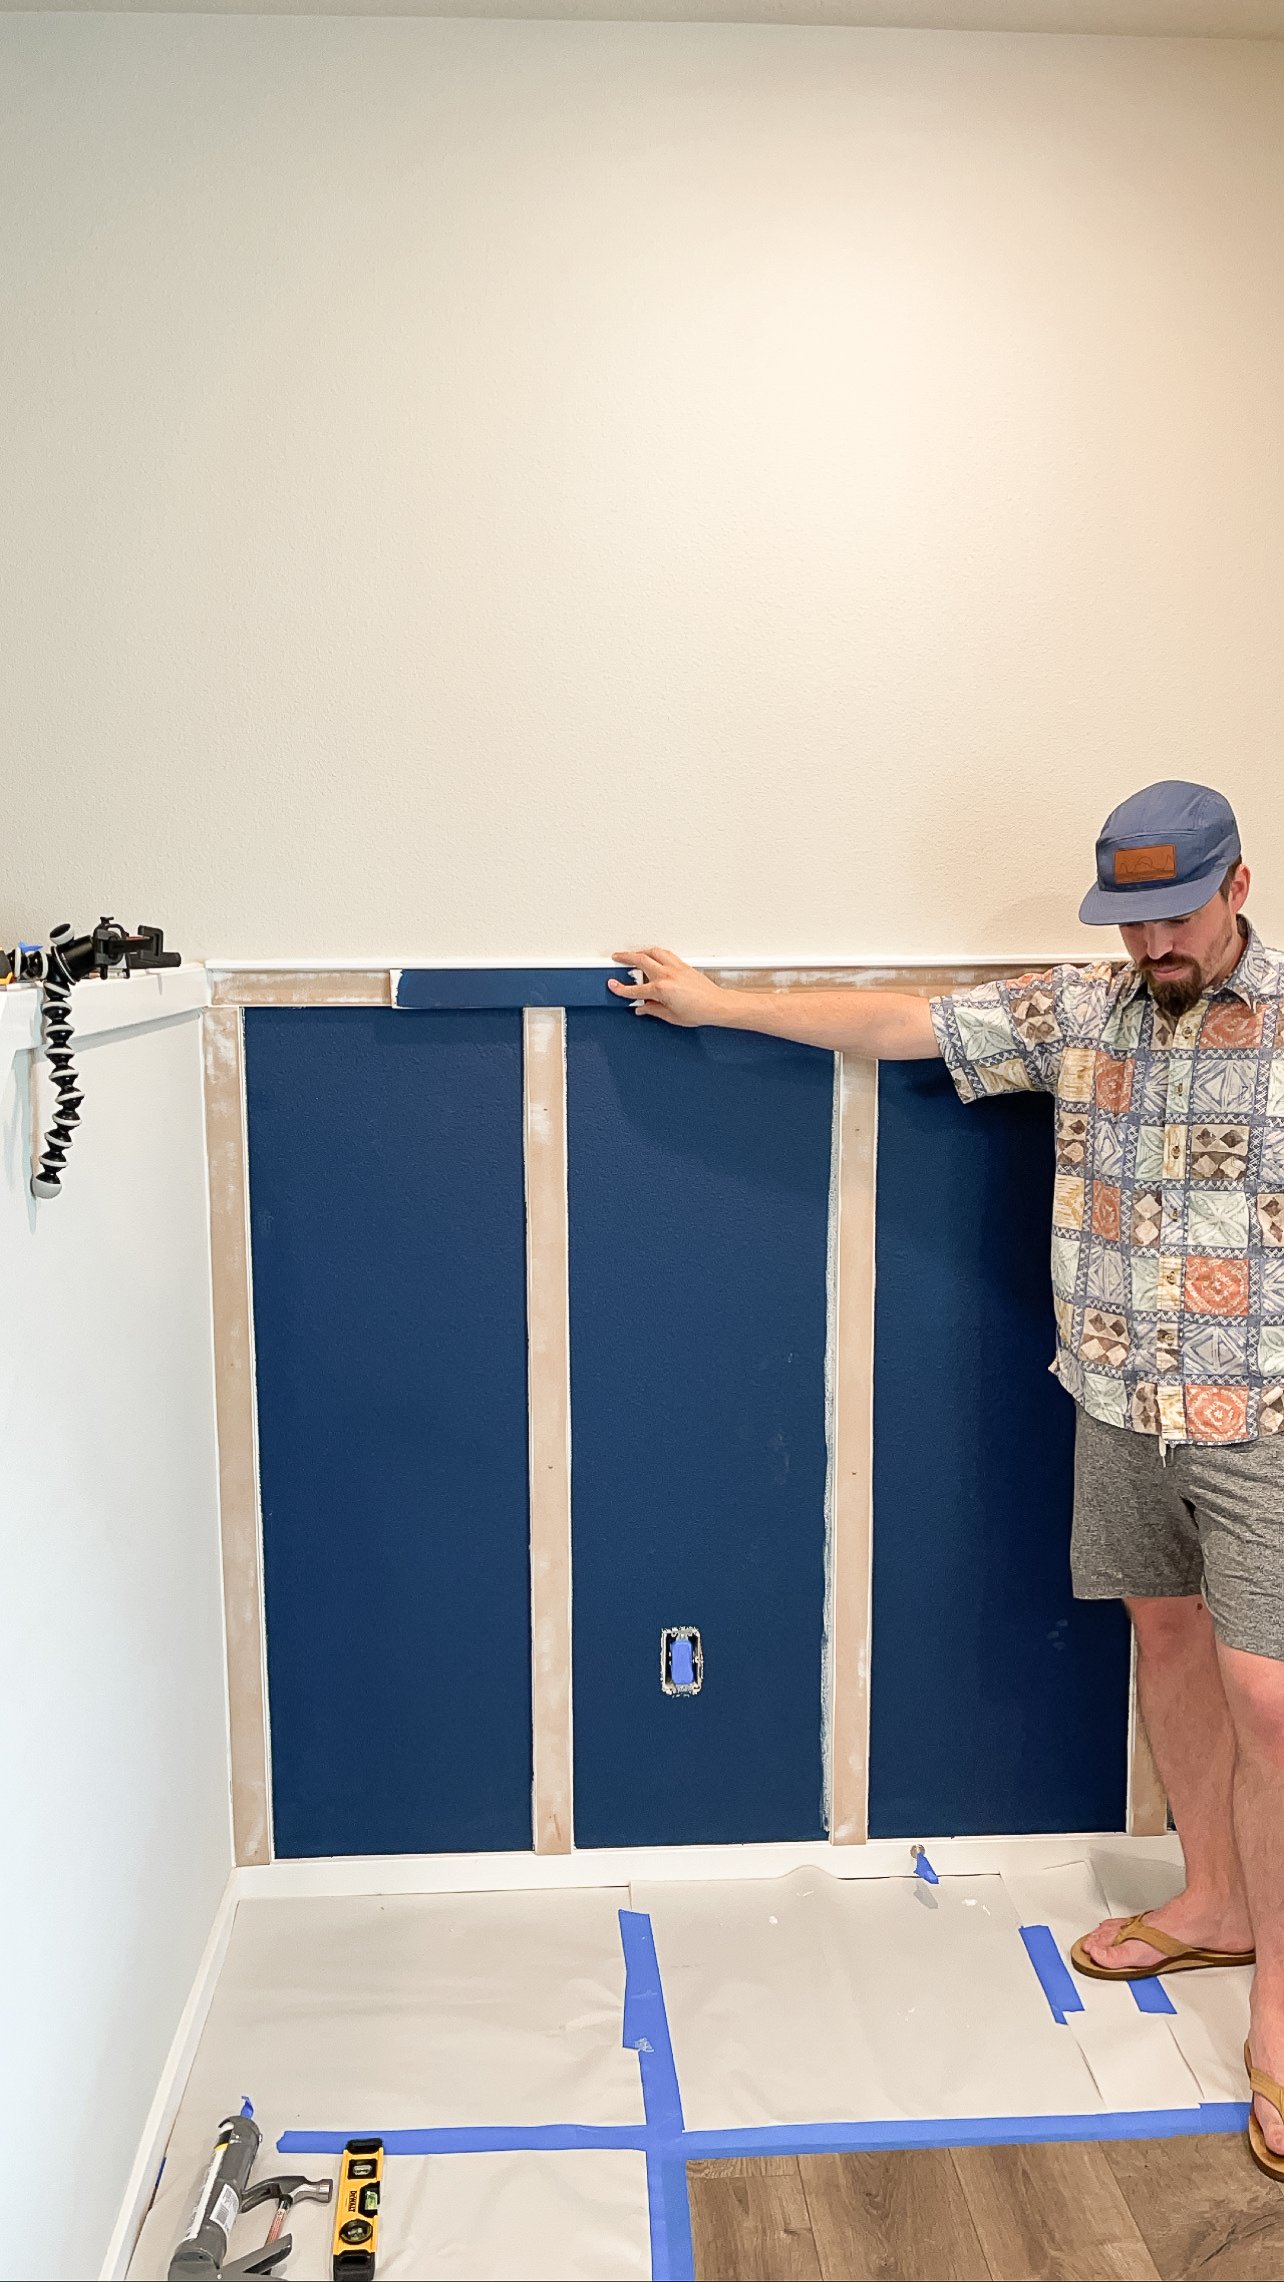
So then the next thing we were considering was — should we paint the top blue or should we keep it consistent with the white trim that already exists for the stairwell? You can see Tim holding up the blue option below. We ended up keeping both the baseboard and top board white and I’m so glad we did! Feels very cohesive with the rest of the entryway.

I’m super proud of this project and I hope it inspires you to tackle one of the projects on your DIY list! If we can do this (this felt BIG to us), so can you!


the sources

From left to right:

  1. Logan 48” Seagrass Console Table

  2. Target Vintage Distressed Rug

  3. Container Store Light Grey Poppin Box Seat

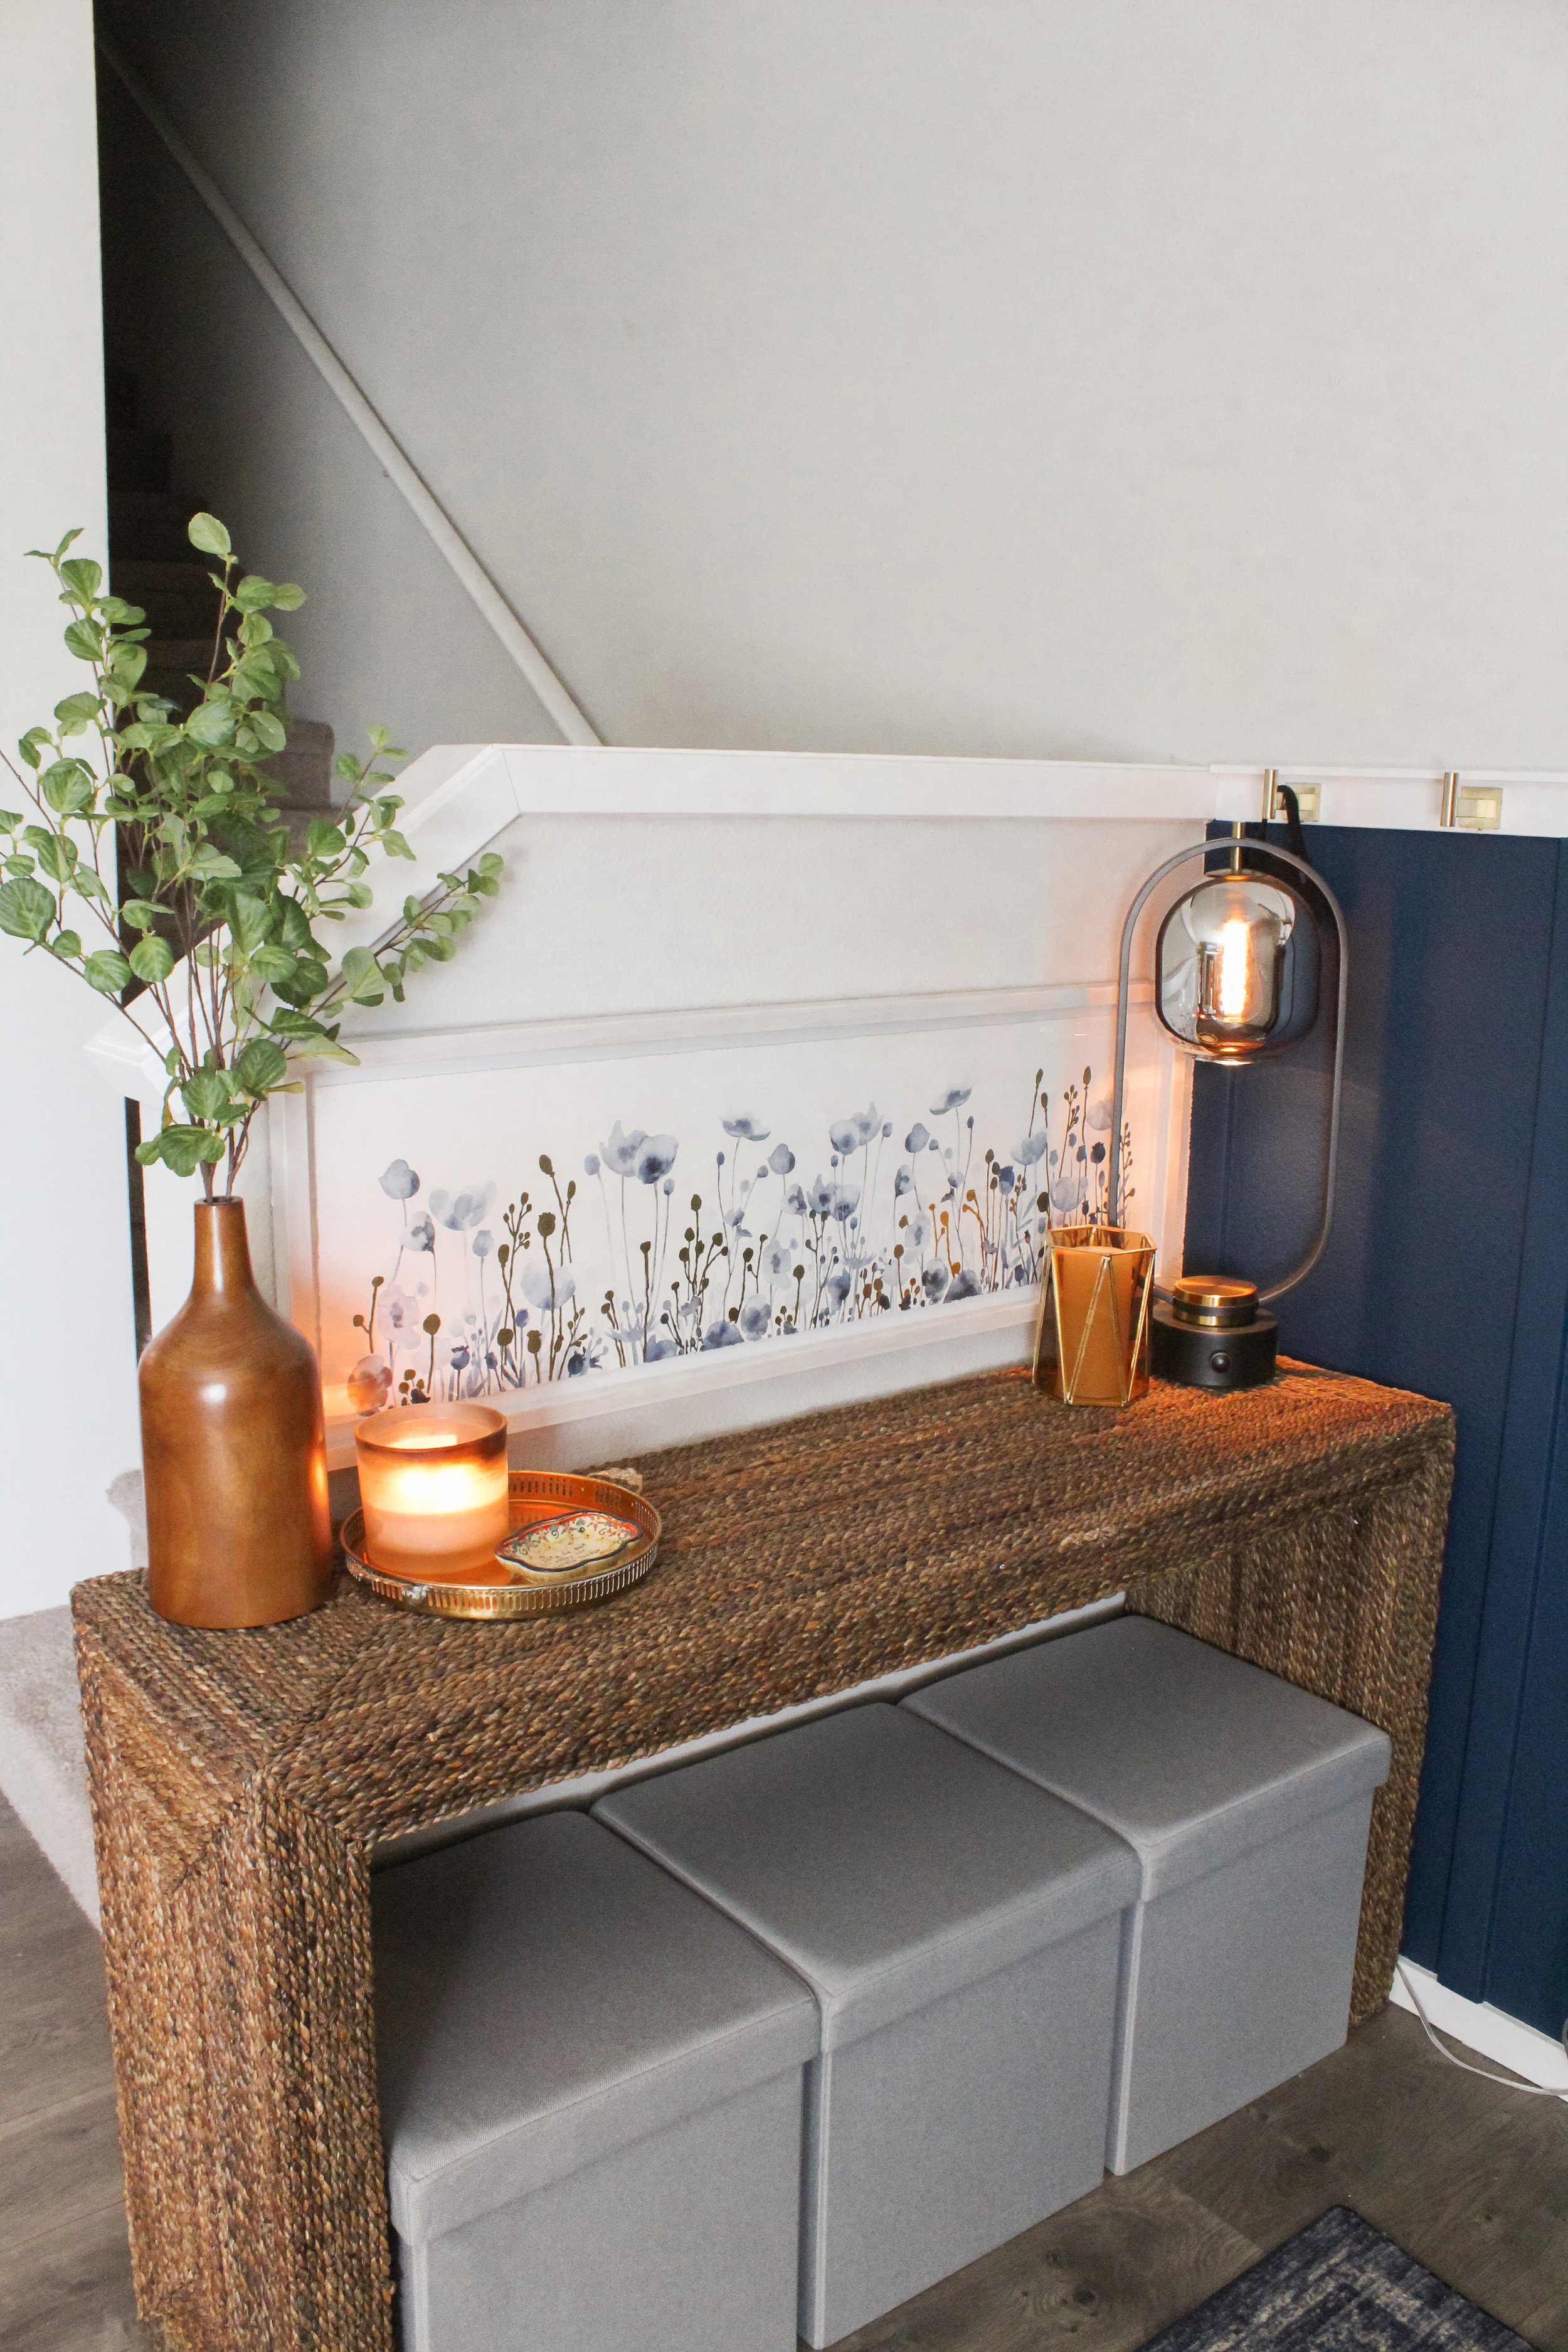
  4. Uttermost Rora 52"W Natural Woven Banana Plant Console Table

  5. Seagrass Console Table (I don’t know much about the linked store, but this is the exact table we got at Pottery Barn — it’s discontinued at PB!)

  6. THE Anthropologie Mirror!

  7. My artwork is from Home Goods, but this one felt surprisingly similar!

  8. Similar gold hooks

  9. I can’t track down our exact lamp (it’s from a cute little shop in Bend, OR), but I also love this one and this one!

  10. Similar vase (mine is from Magnolia last year)

Main Bedroom Update

After tackling downstairs, our bedroom was next on my list — and it’s still a work in progress! Balancing work commitments, life commitments, and trying to tackle home projects all at one time is no joke! So I thought, better to take you all along on the journey and show some progress vs. waiting until it’s perfect (because, when will it be totally perfect, anyways??).

While I’m still waiting on our corner lounge chair to arrive and wrapping up the DIY picture frame trim, among other smaller details, I thought I’d give you a peek into its current state — because even with all of these things unfinished, this room still brings me so much joy!

First, let’s start with the mood board I created probably about 2 weeks after we moved in — ambitious, I know 😉 I have to start every project with a mood board so I can easily tell what will and won’t work together. Even though it’s digital — which is SO different than live, in-person — it still helps me visualize how all the pieces I’m eyeing will come together. I use InDesign to create mine, but I’ve also heard people use programs like Canva.

the vision

In general, I’m a huge fan of moody tones and vibes in homes. I love coming home to a space that feels cozy and inviting. And I’m not afraid of color. In fact, we currently have two very bold colors in our home (dark blue and deep berry), and I’m in the midst of picking a third for my office — give me all the colors!

So for our bedroom, I wanted to especially highlight the moodiness and coziness because at the end of the day all you want to do when your head hits the pillow is relax.

I wanted the color to be dark and romantic, and for it to be the statement in the room — like, bam! Here I am world. Bold and beautiful. So that’s exactly what I did. I picked Behr’s Twinberry and, while we’ve only painted one wall so far (behind the bed), I secretly-not-so-secretly want to paint our whole room this color because it’s oh so cozy (don’t tell my husband 😉).


where we’re at today

So far, we’ve tackled the following:

  1. Wall paint behind the bed

  2. All new furniture (still waiting on ONE piece from Crate & Barrel — our lounge chair! Which is actually quite different from what’s pictured in the mood board above. It should be delivered in February, and I’m keeping it a bit of a surprise until then 😏)

  3. All new bedding

  4. New curtains

  5. New rug

  6. Some curated, thrifted pieces

This may not sound like a lot of progress, but peek where we started below — it feels like night and day to us!

Let’s talk about bedding for a second. To help achieve that moody and cozy feel I went for a simple down comforter and quilt blanket and then lots and lots of different textures for the pillows and throw blanket. I love that the textures help bring in more personality AND that they’re easily swapped out if I’m feeling like a new vibe for a new season.

I also want to talk about pattern mixing. To me, this is one of THE most fun things about designing a space. Bringing all the colors and tones together in various ways throughout the space. In our room, the pattern mixing is definitely there, but maybe a bit more subtle than what you’ve seen in other spaces. You see it come through more overtly in our floral curtains and damask rug, but there are also other more subtle patterns, like the quilt blanket and the lumbar pillow in the middle of the bed.

what’s next

As I’m writing this, I’m almost done cutting and painting the picture frame trim that will line the wall behind the bed. I’m so so excited to install this — I think it’s going to elevate the whole space. Will write a separate update once that’s done!

Other things on my mind for this room:

  1. (Finally) receive our lounge chair! + style that corner of the room

  2. Replace the beige lamp shades with black empire shades

  3. Style the entry nook (will show you this another day once I have a plan!)

  4. Figure out the bathroom and closet — one step at a time, we’ve done nothing to those spaces yet

So even though things aren’t totally put together in this room, I hope this gives you some inspiration that you really don’t have to do much to make a big impact and difference in your space — a few coats of paint and some styling does WONDERS.


where we started

…need I say more?

after

before


sources

From left to right, top to bottom:

  1. Bed frame

  2. Nightstand (our exact side tables are out of stock, but I’m linking something similar!)

  3. Dresser

  4. Duvet cover + sheet set

  5. Throw blanket (I can’t find the pink one, but they have other colors!)

  6. Boucle euro pillow

  7. Bench

  8. Rug

  9. Curtains

  10. Quilt

DIY Repurposed Christmas Garland

There’s nothing like finding the perfect Christmas garland… pre-lit, perfect length and fullness, not tacky. I found ours at Costco a few years ago and as our aesthetic has shifted and grown, I knew I needed to give it a little makeover. It had red poinsettias and red accents all over the place, which normally would be perfect for the Christmas season, but now with our blue walls downstairs, it made Christmas feel more like the Fourth of July.

So a few weekends ago it looked like Christmas had exploded in our home as I was sifting through all of our decor to get rid of any hint of red (except a few of our more elegant red accents). I was complaining to my brother-in-law about how much I loved my garland but that unfortunately, she had to bite the dust because of all the red. And then he suggested I DIY the dang thing… why didn’t I think of that?! Such a good idea, plus a great way to save money.

Off to JoAnn’s we went! And boy did I come back with quite the faux floral haul. You probably already know how much I love faux floral given a few recent blog posts (DIY Fall Floral Pumpkin, DIY Fall Vintage Dough Bowl Centerpiece, and DIY Seasonal Vintage Dough Bowl Centerpiece), but man I’m telling you I could create my own faux floral storefront at this point with how much I’ve accumulated 😂

Here’s just a sampling of what I found:

The evening I got home from my JoAnn’s extravaganza, Tim put on Dune and I went to work. I clipped off every last poinsettia and red accent I could find on the garland and started laying down the faux floral and gold ornaments in their place. It was getting late, so I went to bed and the next morning I tied the ornaments on and hot glued the floral. It honestly turned out so much cuter than I ever imagined! It feels much more elevated and elegant when compared to its original state (check out my Instagram to see the comparison!) and I love how it ties into our new Christmas decor theme (blues and greens).

What’s your favorite Christmas or holiday decor DIY? Shout out in the comments!